Categories
Featured Finished Projects How-To or Review Uncategorized

Quilted Stocking- Tutorial & Tips

I had so much fun making stockings for our family of 3 that I wanted to share it with you… now that Christmas has passed, lol. Better late than never!

Mostly I used this tutorial from the Moda Bake Shop site and this photo I saw on Flickr. I’m really only going to share what I did differently and any tips I think would be useful.

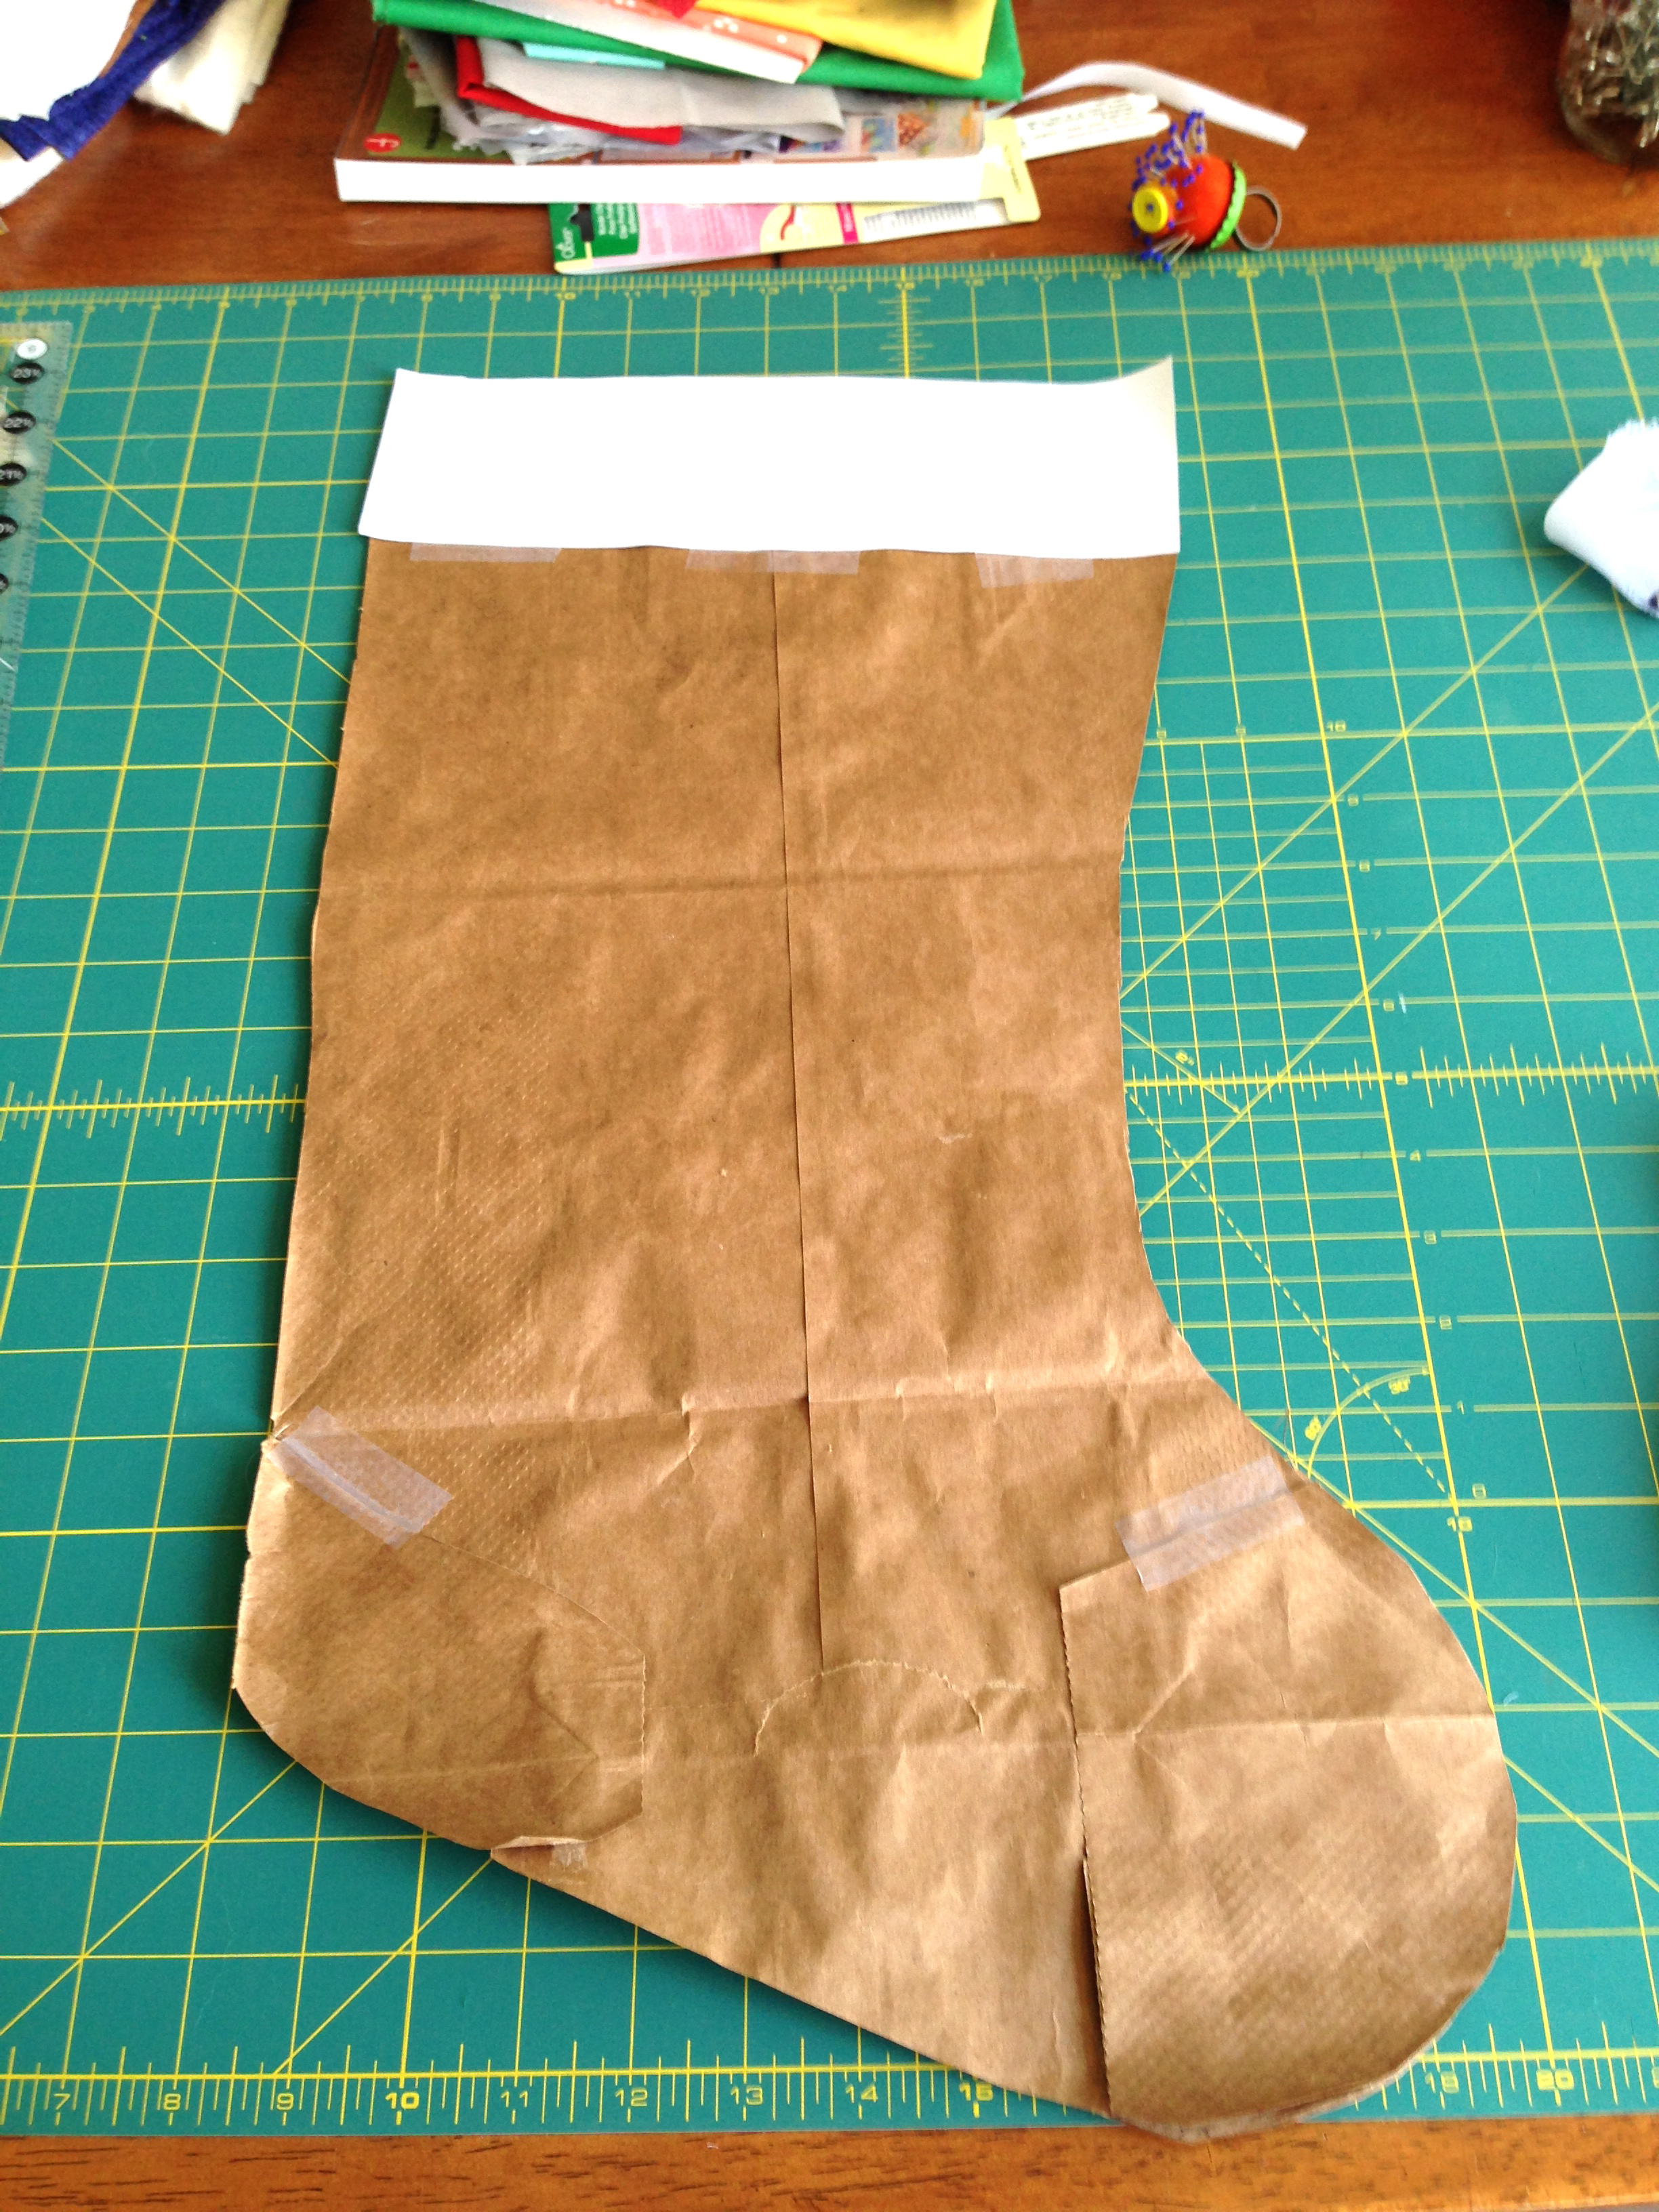
First I used our existing stockings to make a pattern piece out of a paper grocery bag instead of the template they provide. I traced it with some space all the way around. I didn’t fuss to make it perfect.

IMG_2584

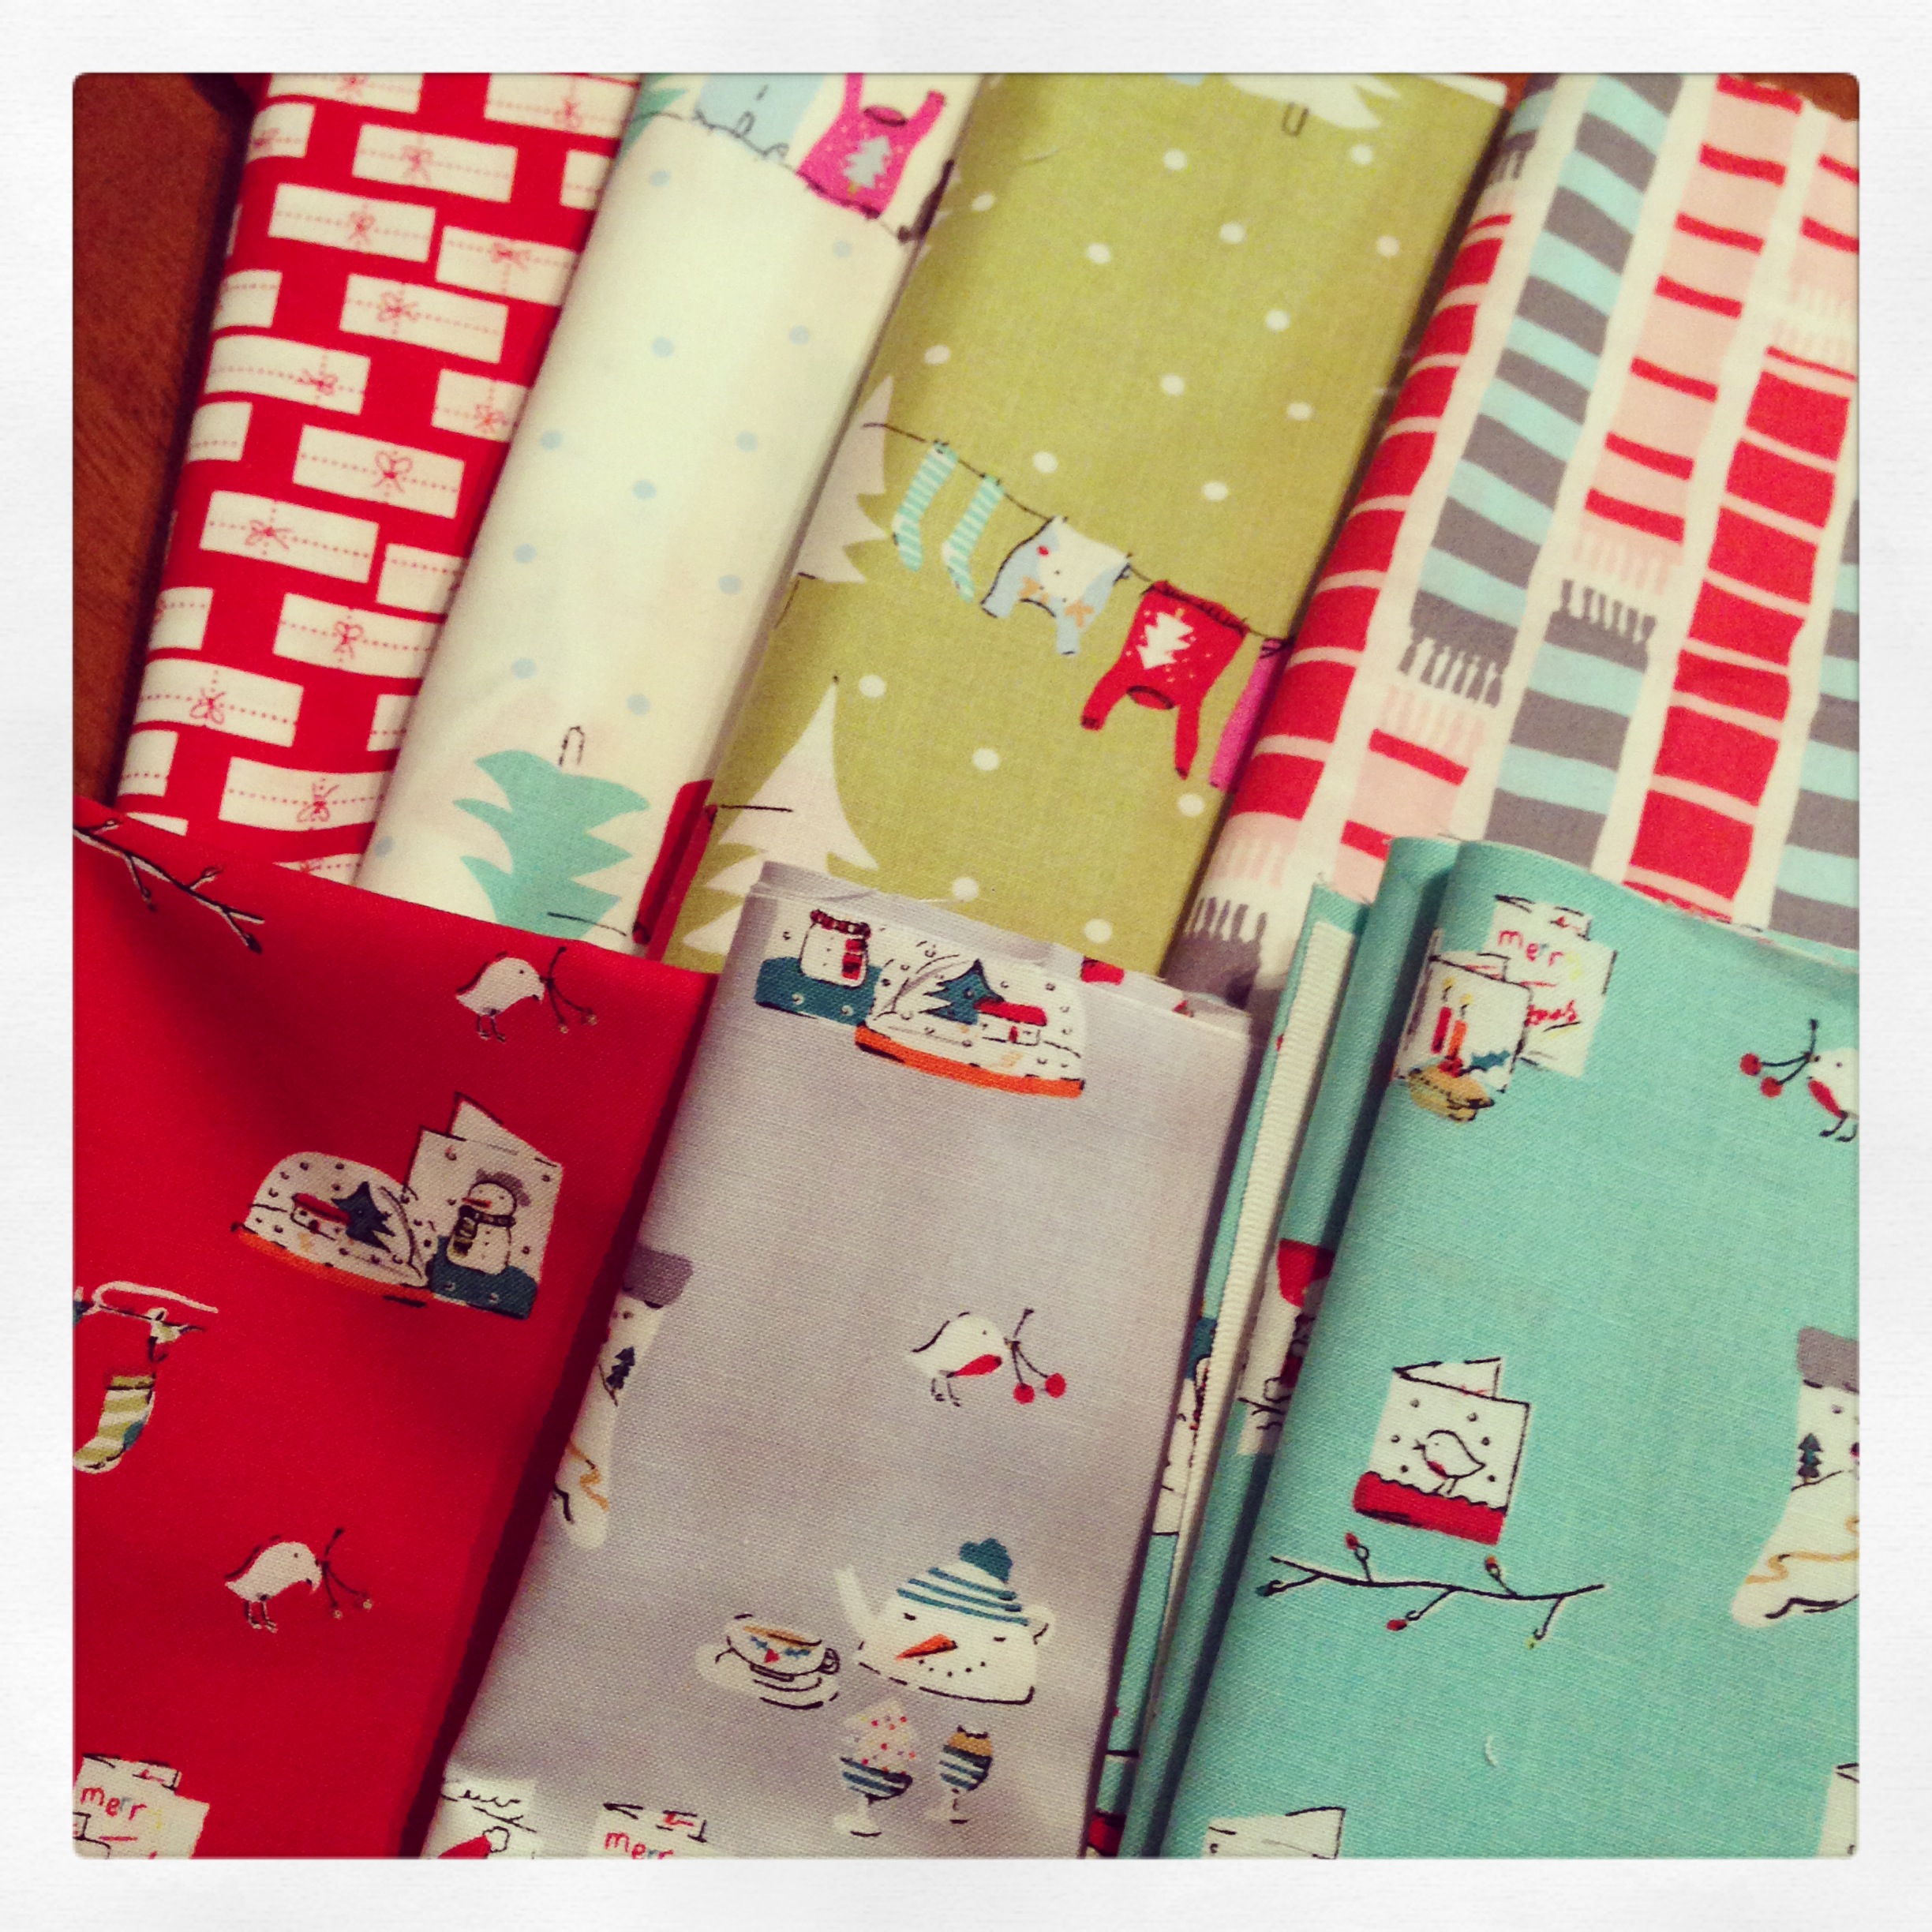
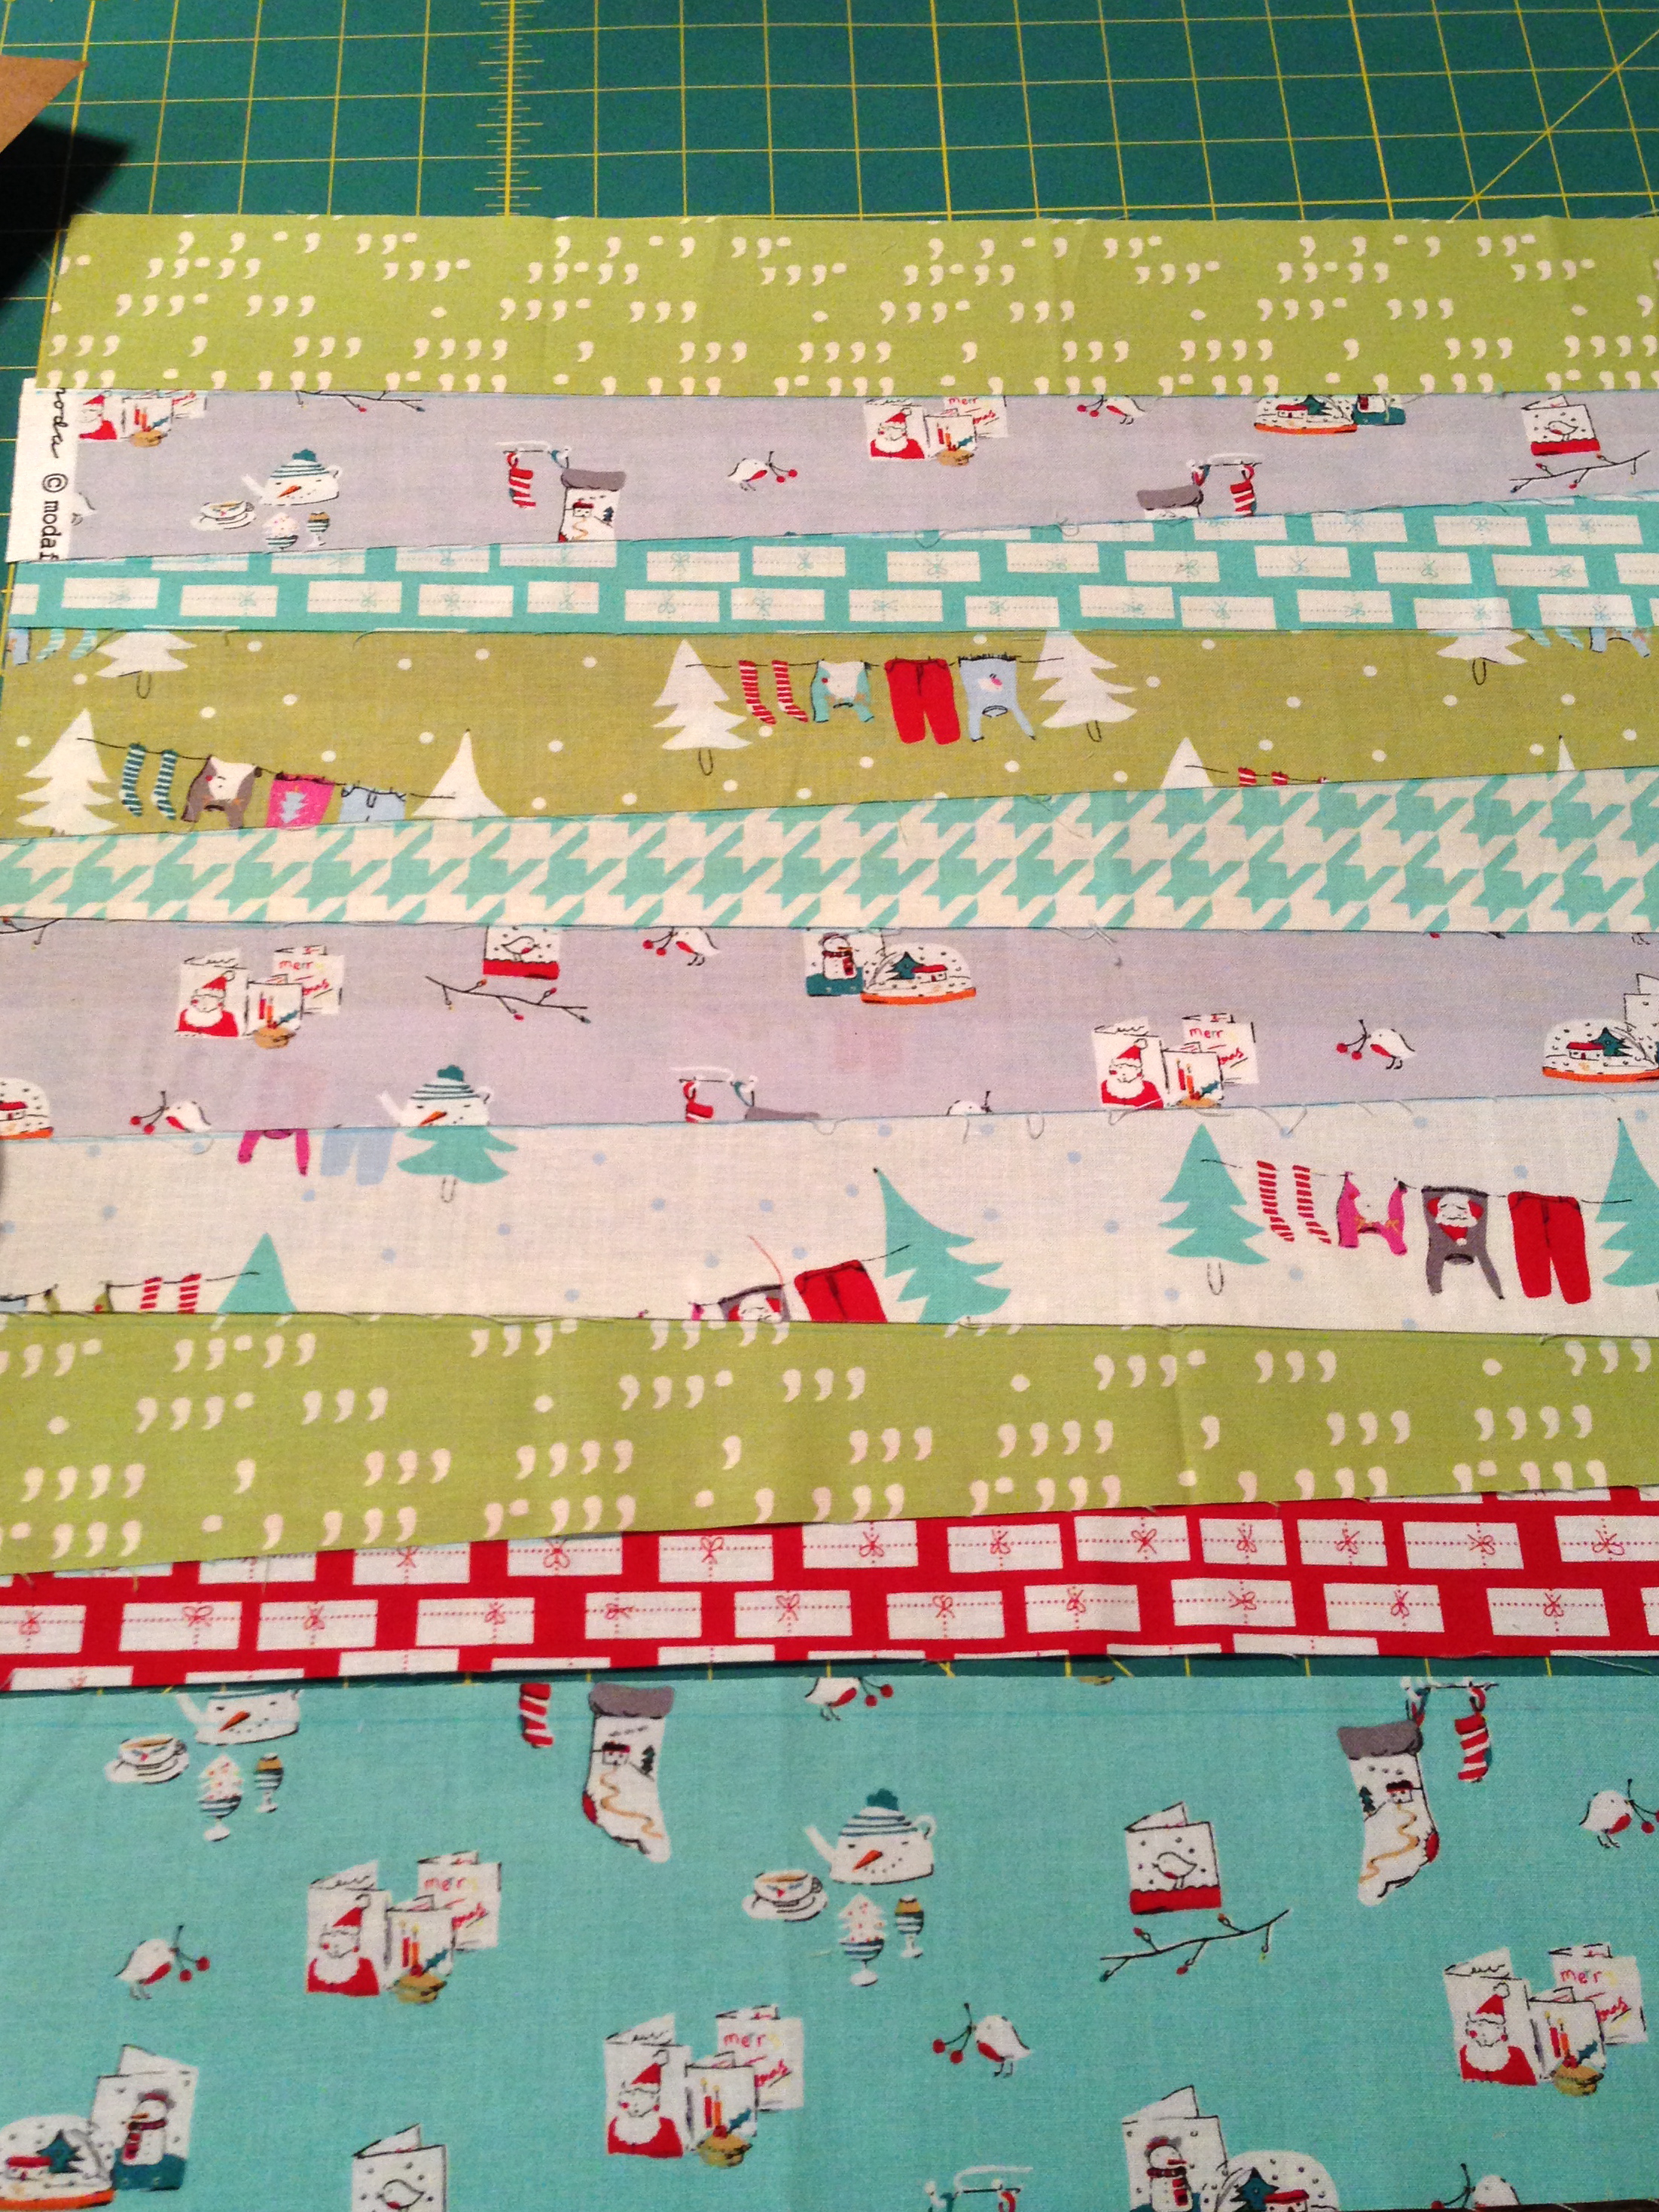
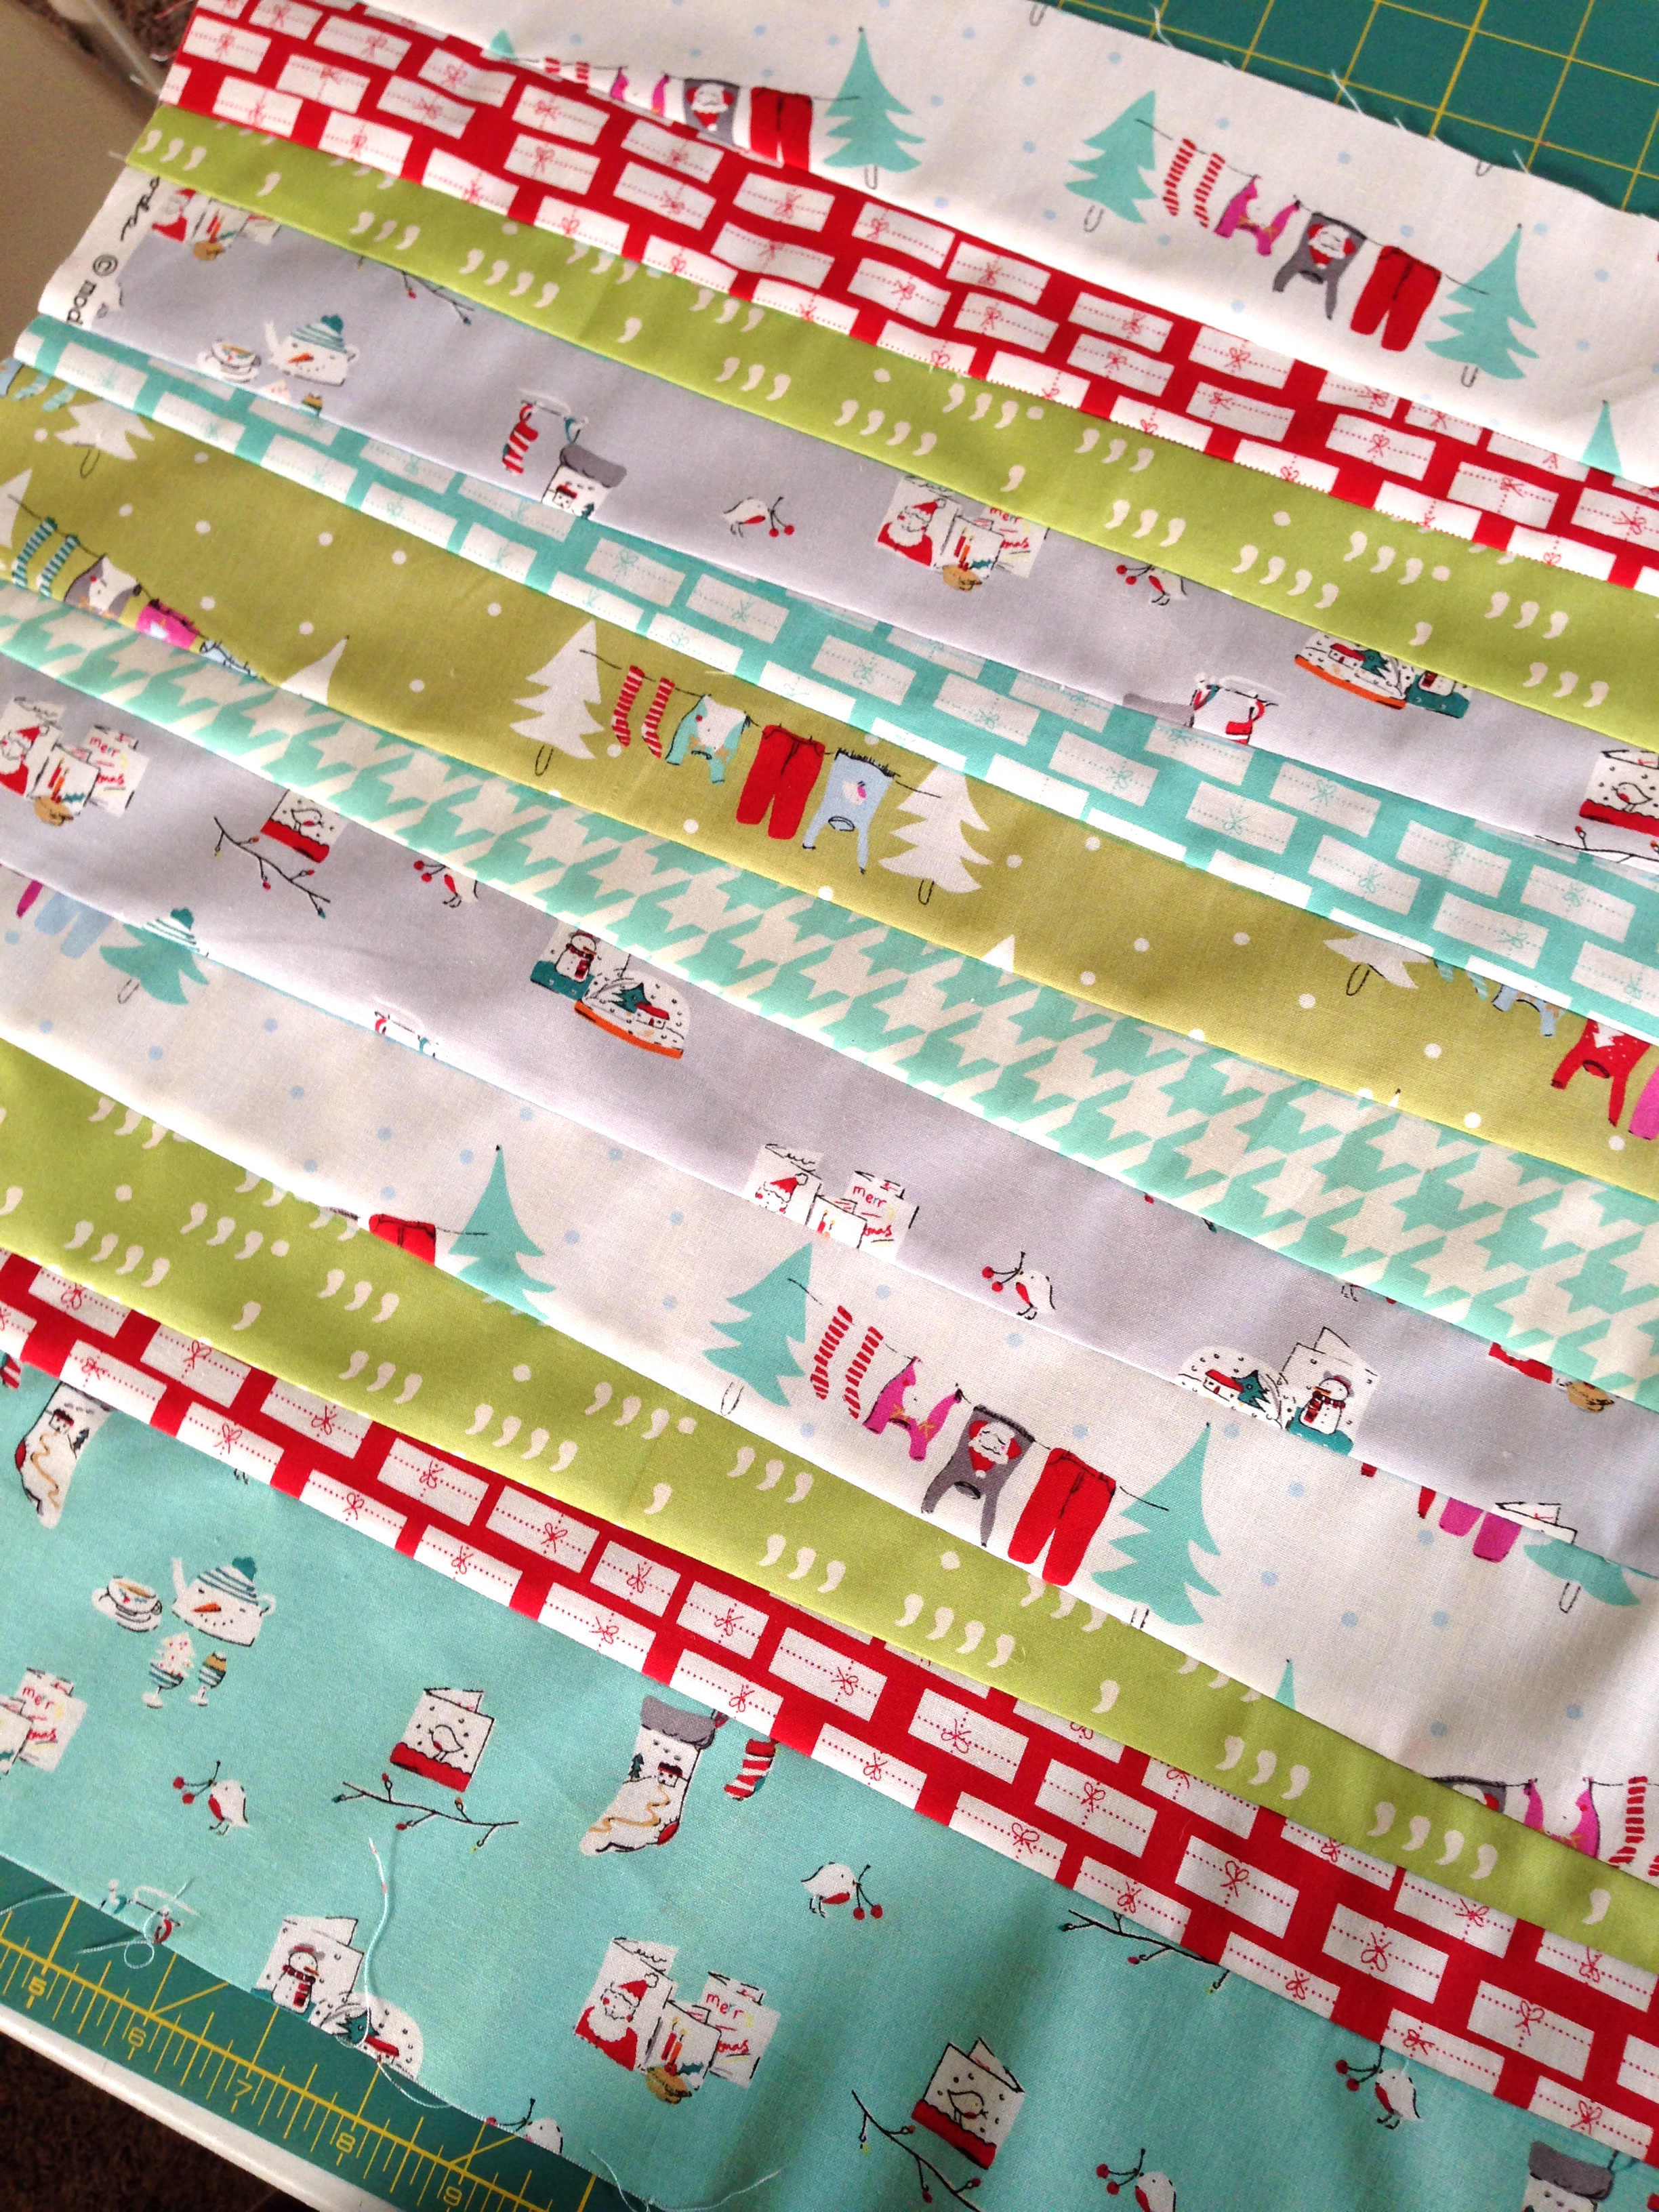
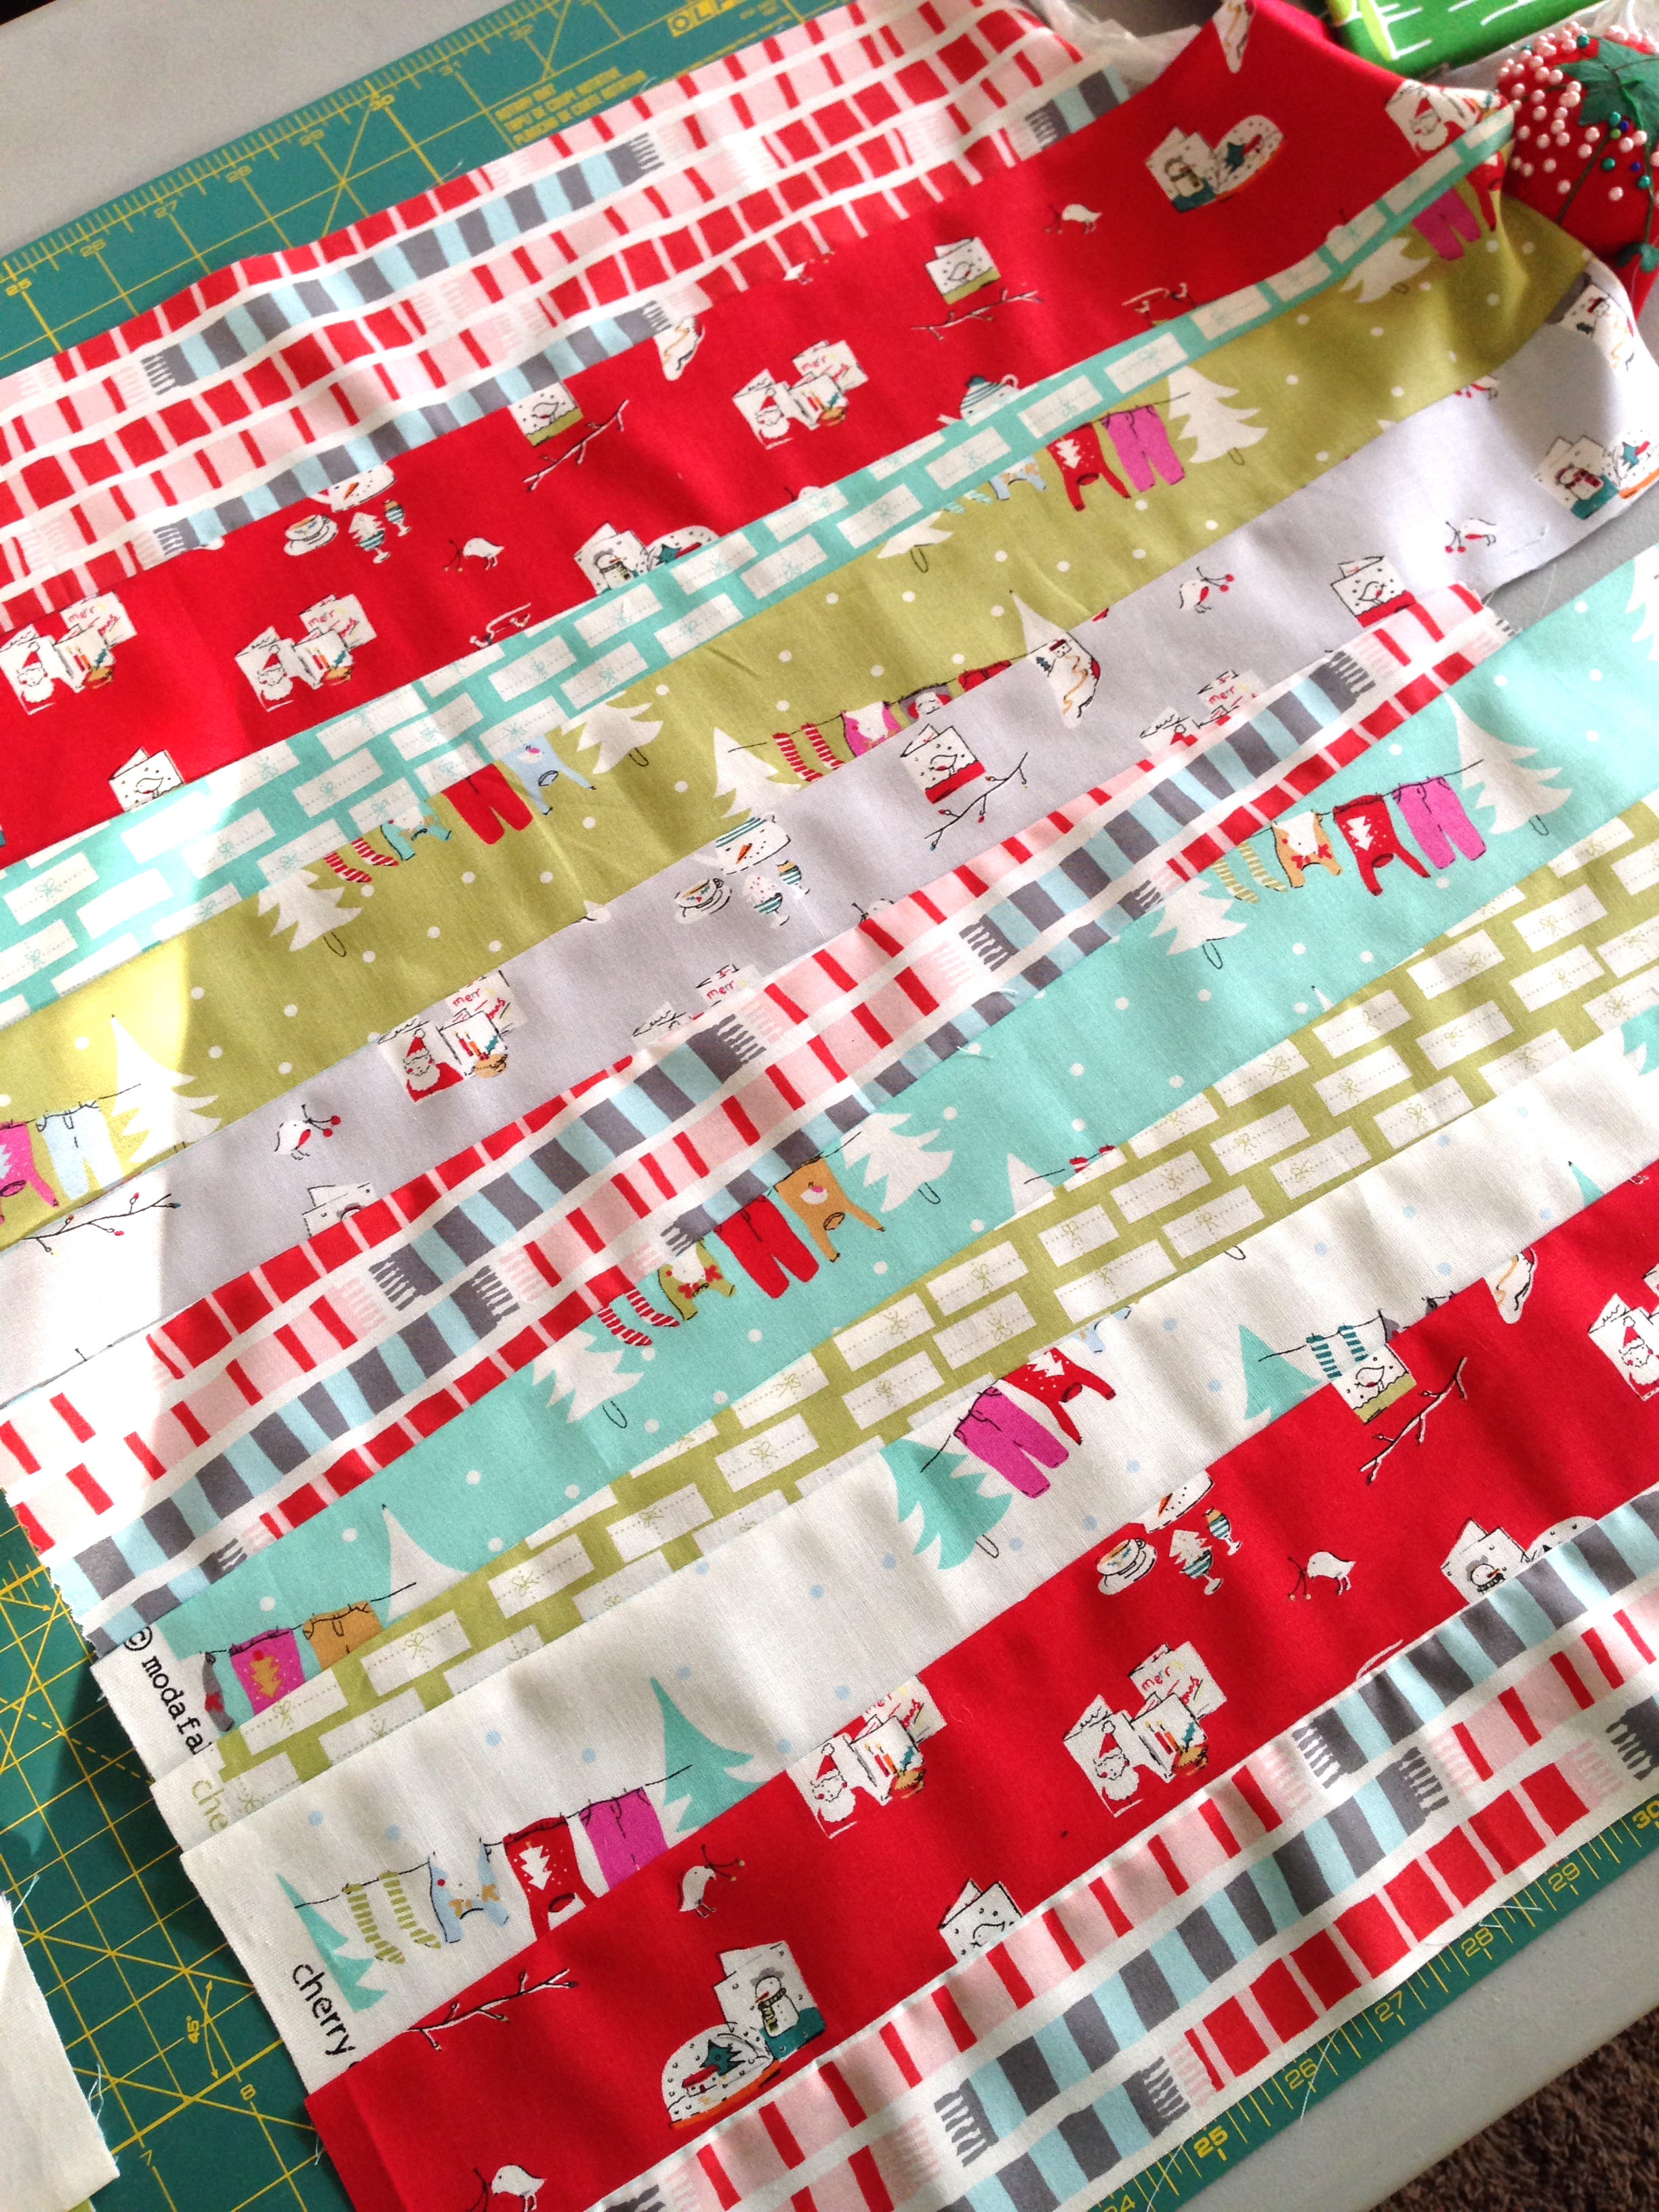
Then I cut my strips from the Cherry Christmas collection by Aneela Hoey along with some coordinating fabrics. I didn’t fuss about what thickness. The tutorial didn’t really explain the best approach to get the diagonal strips, so I thought I would share how I decided to do it:

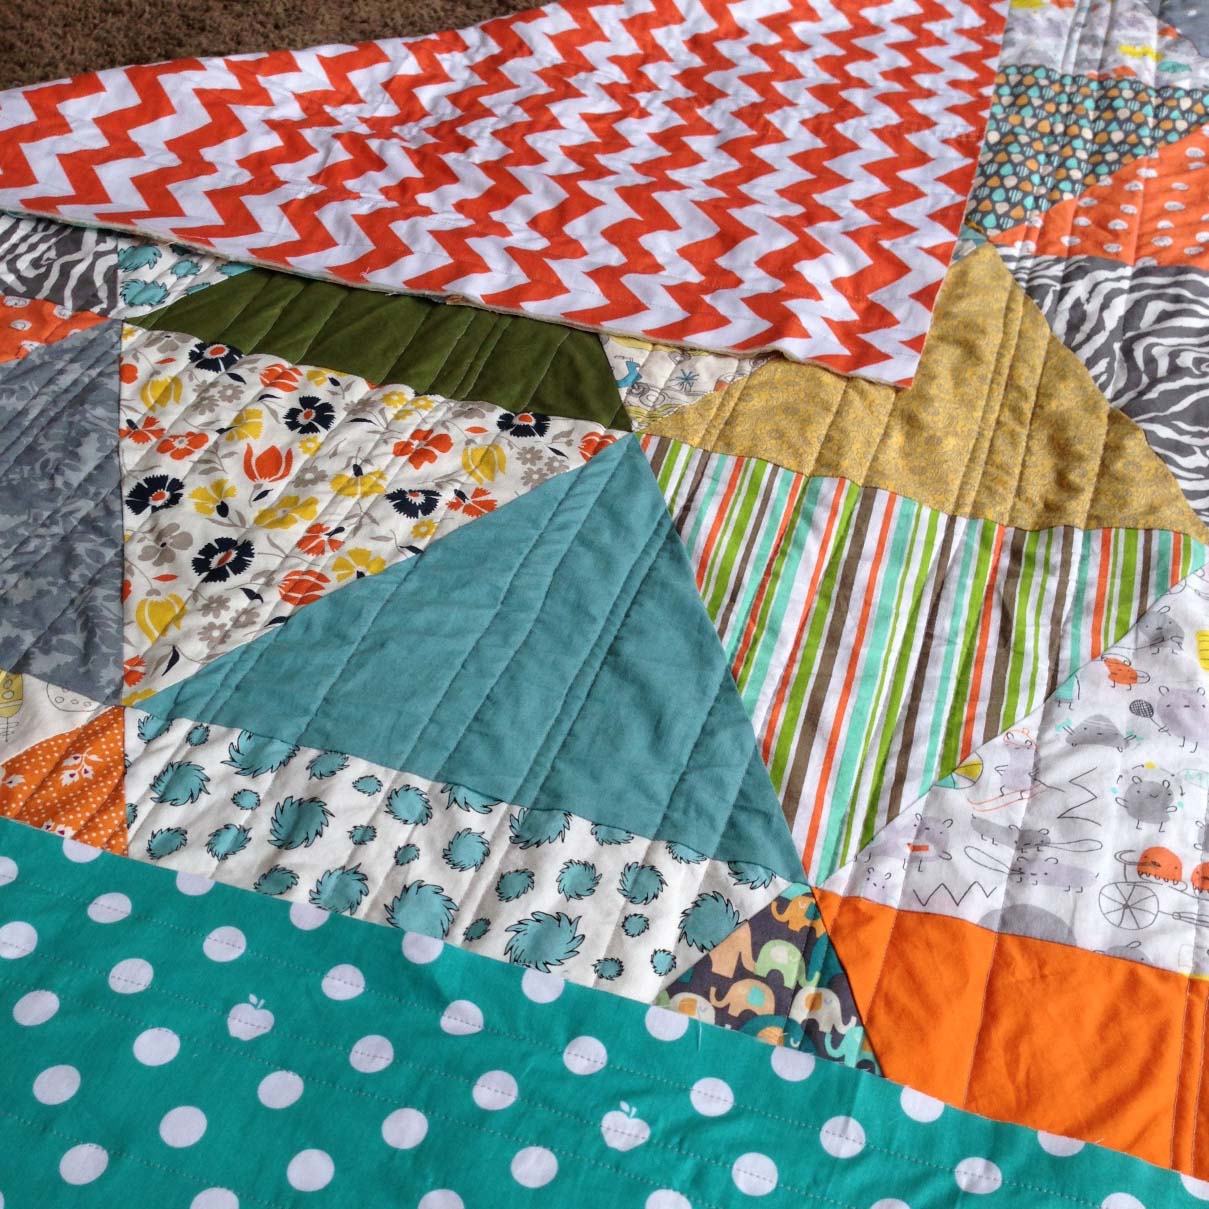
I laid them all out straight at first to get my pattern down. Once decided, I laid them on top of each other into diagonals, alternating, so they become wedges. For ease, I used my water fabric pen and traced the edges of each strip onto the strip below it (this tells me what angle to cut that wedge in order to match up with the ones next to it). Using that drawn line, I trimmed the strips to a 1/4″ seam allowance. So now, they are wedge shaped. Make sure that the fabric always overlaps the strip below it by at least 1/4″ because of your seam allowance. Line up the raw edges and sew them all together. Press it all out beautifully.

IMG_0970

IMG_1353

IMG_1361

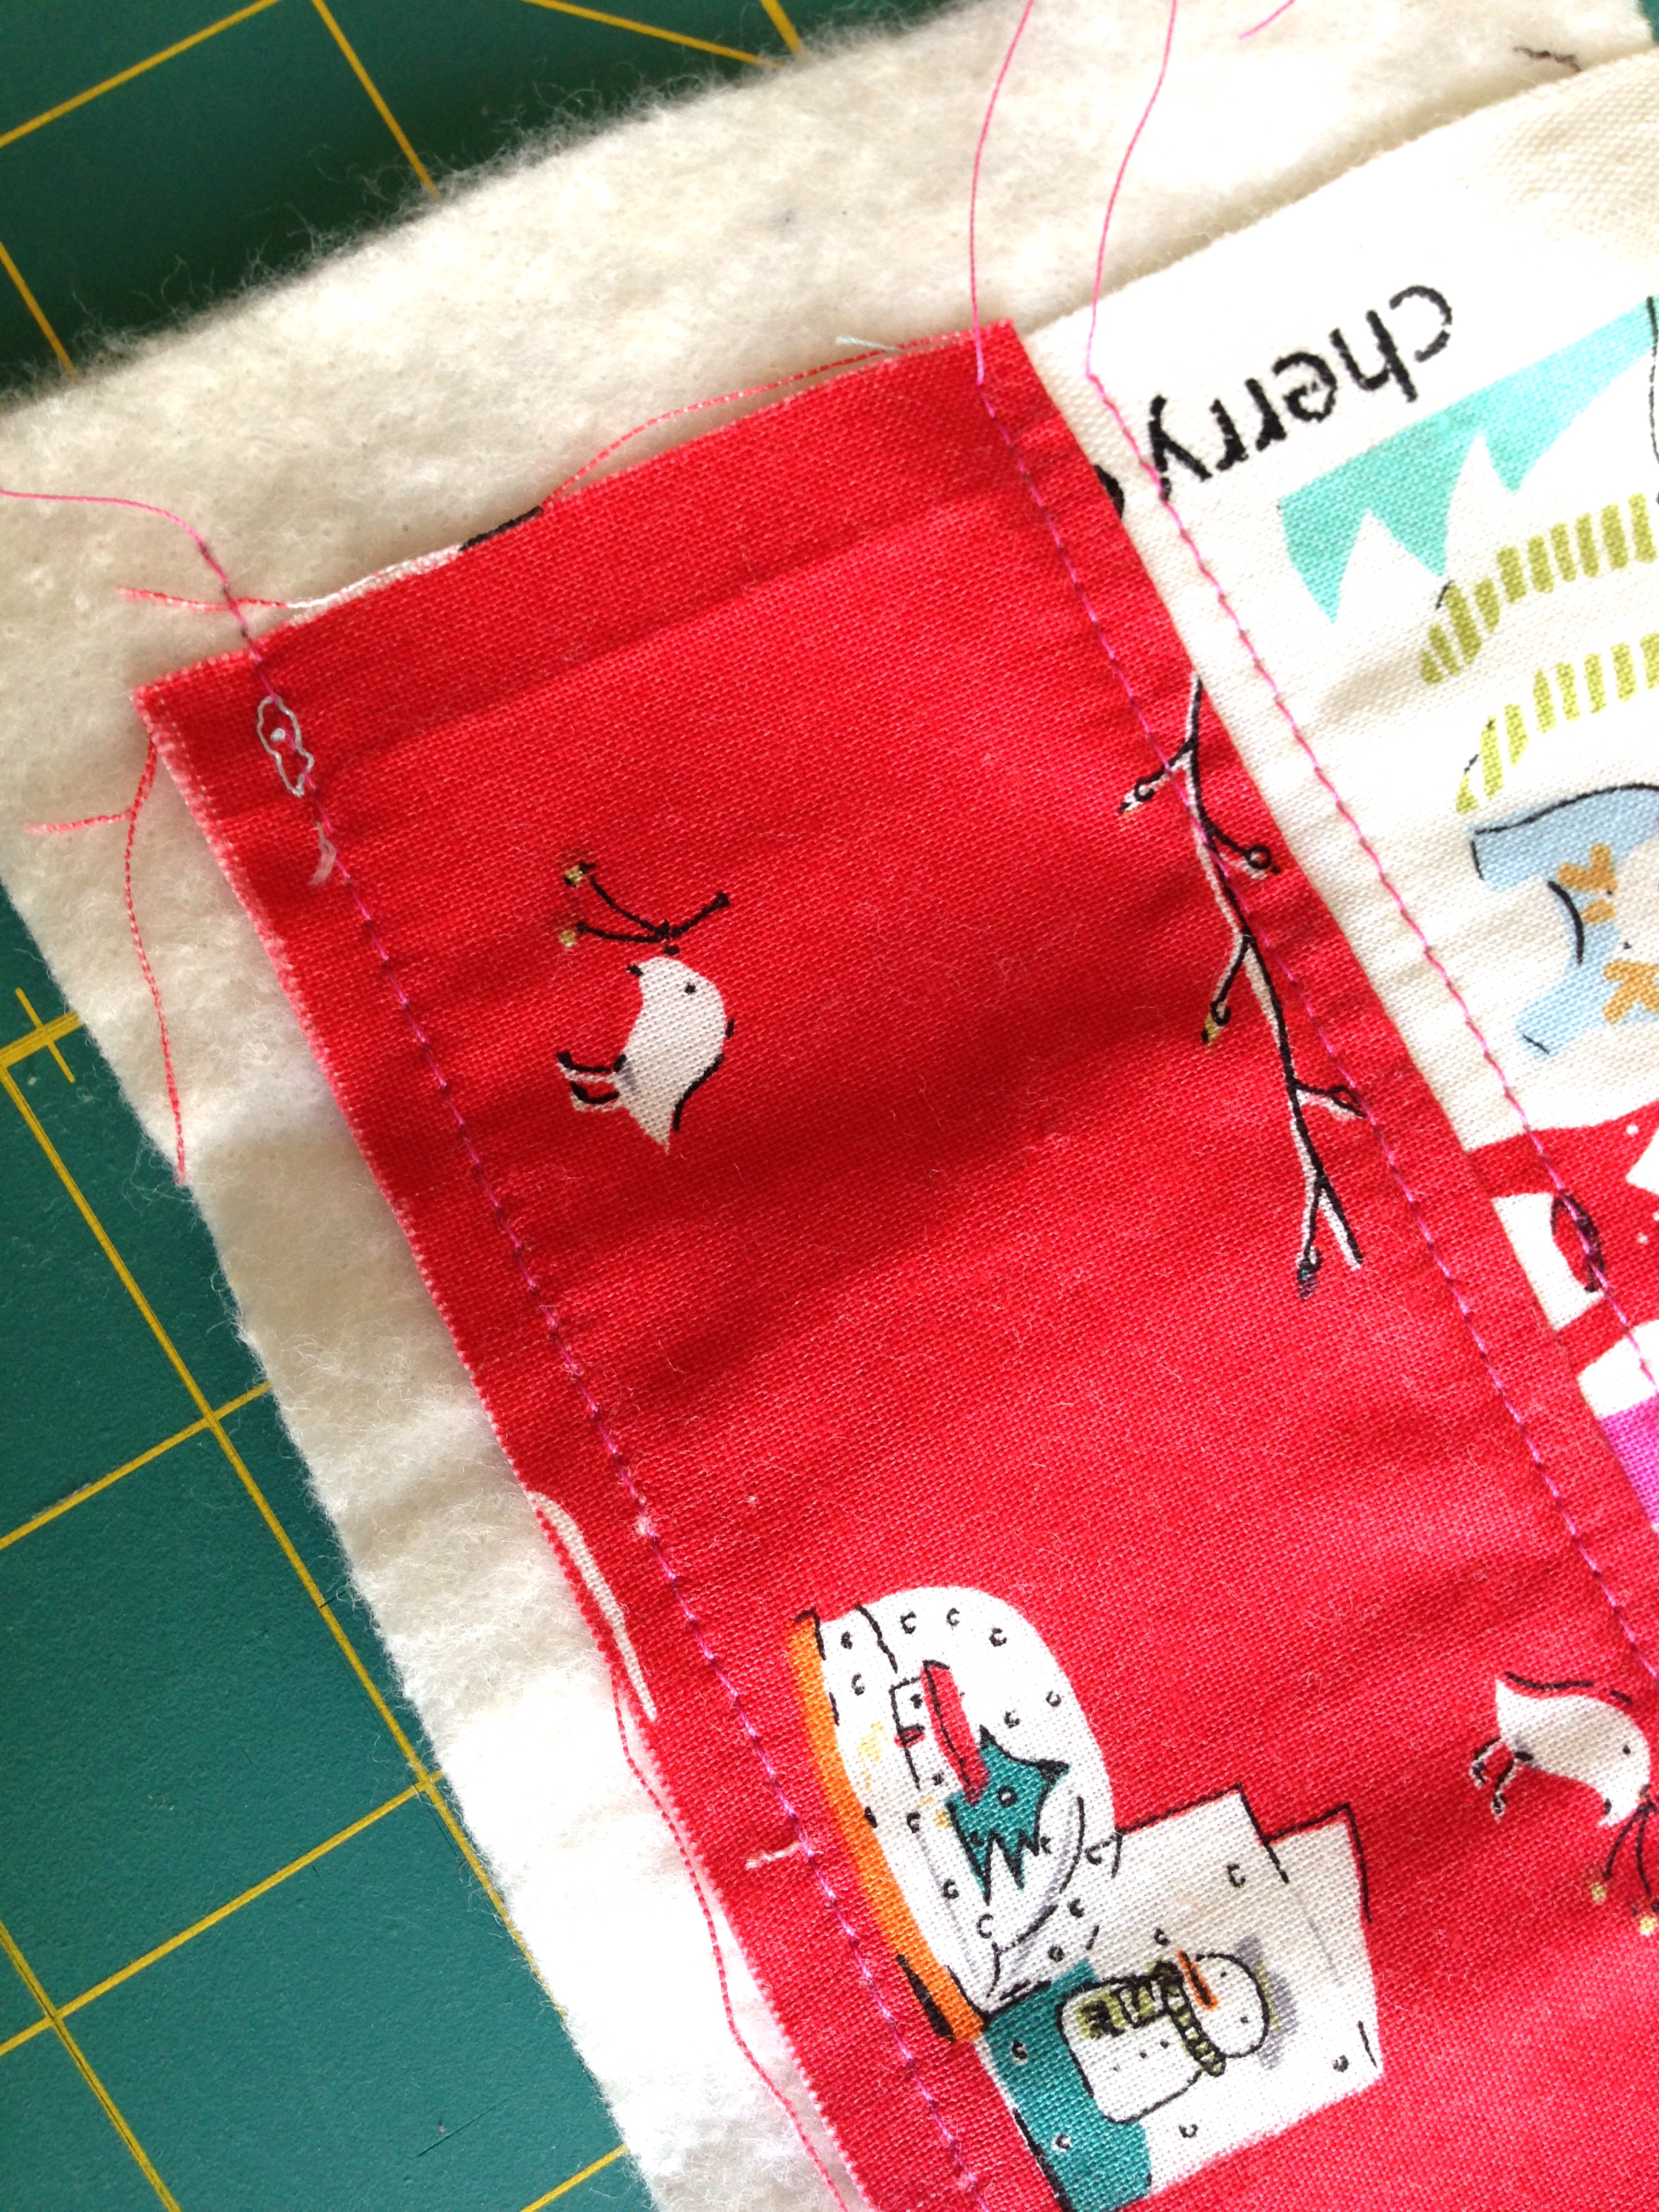
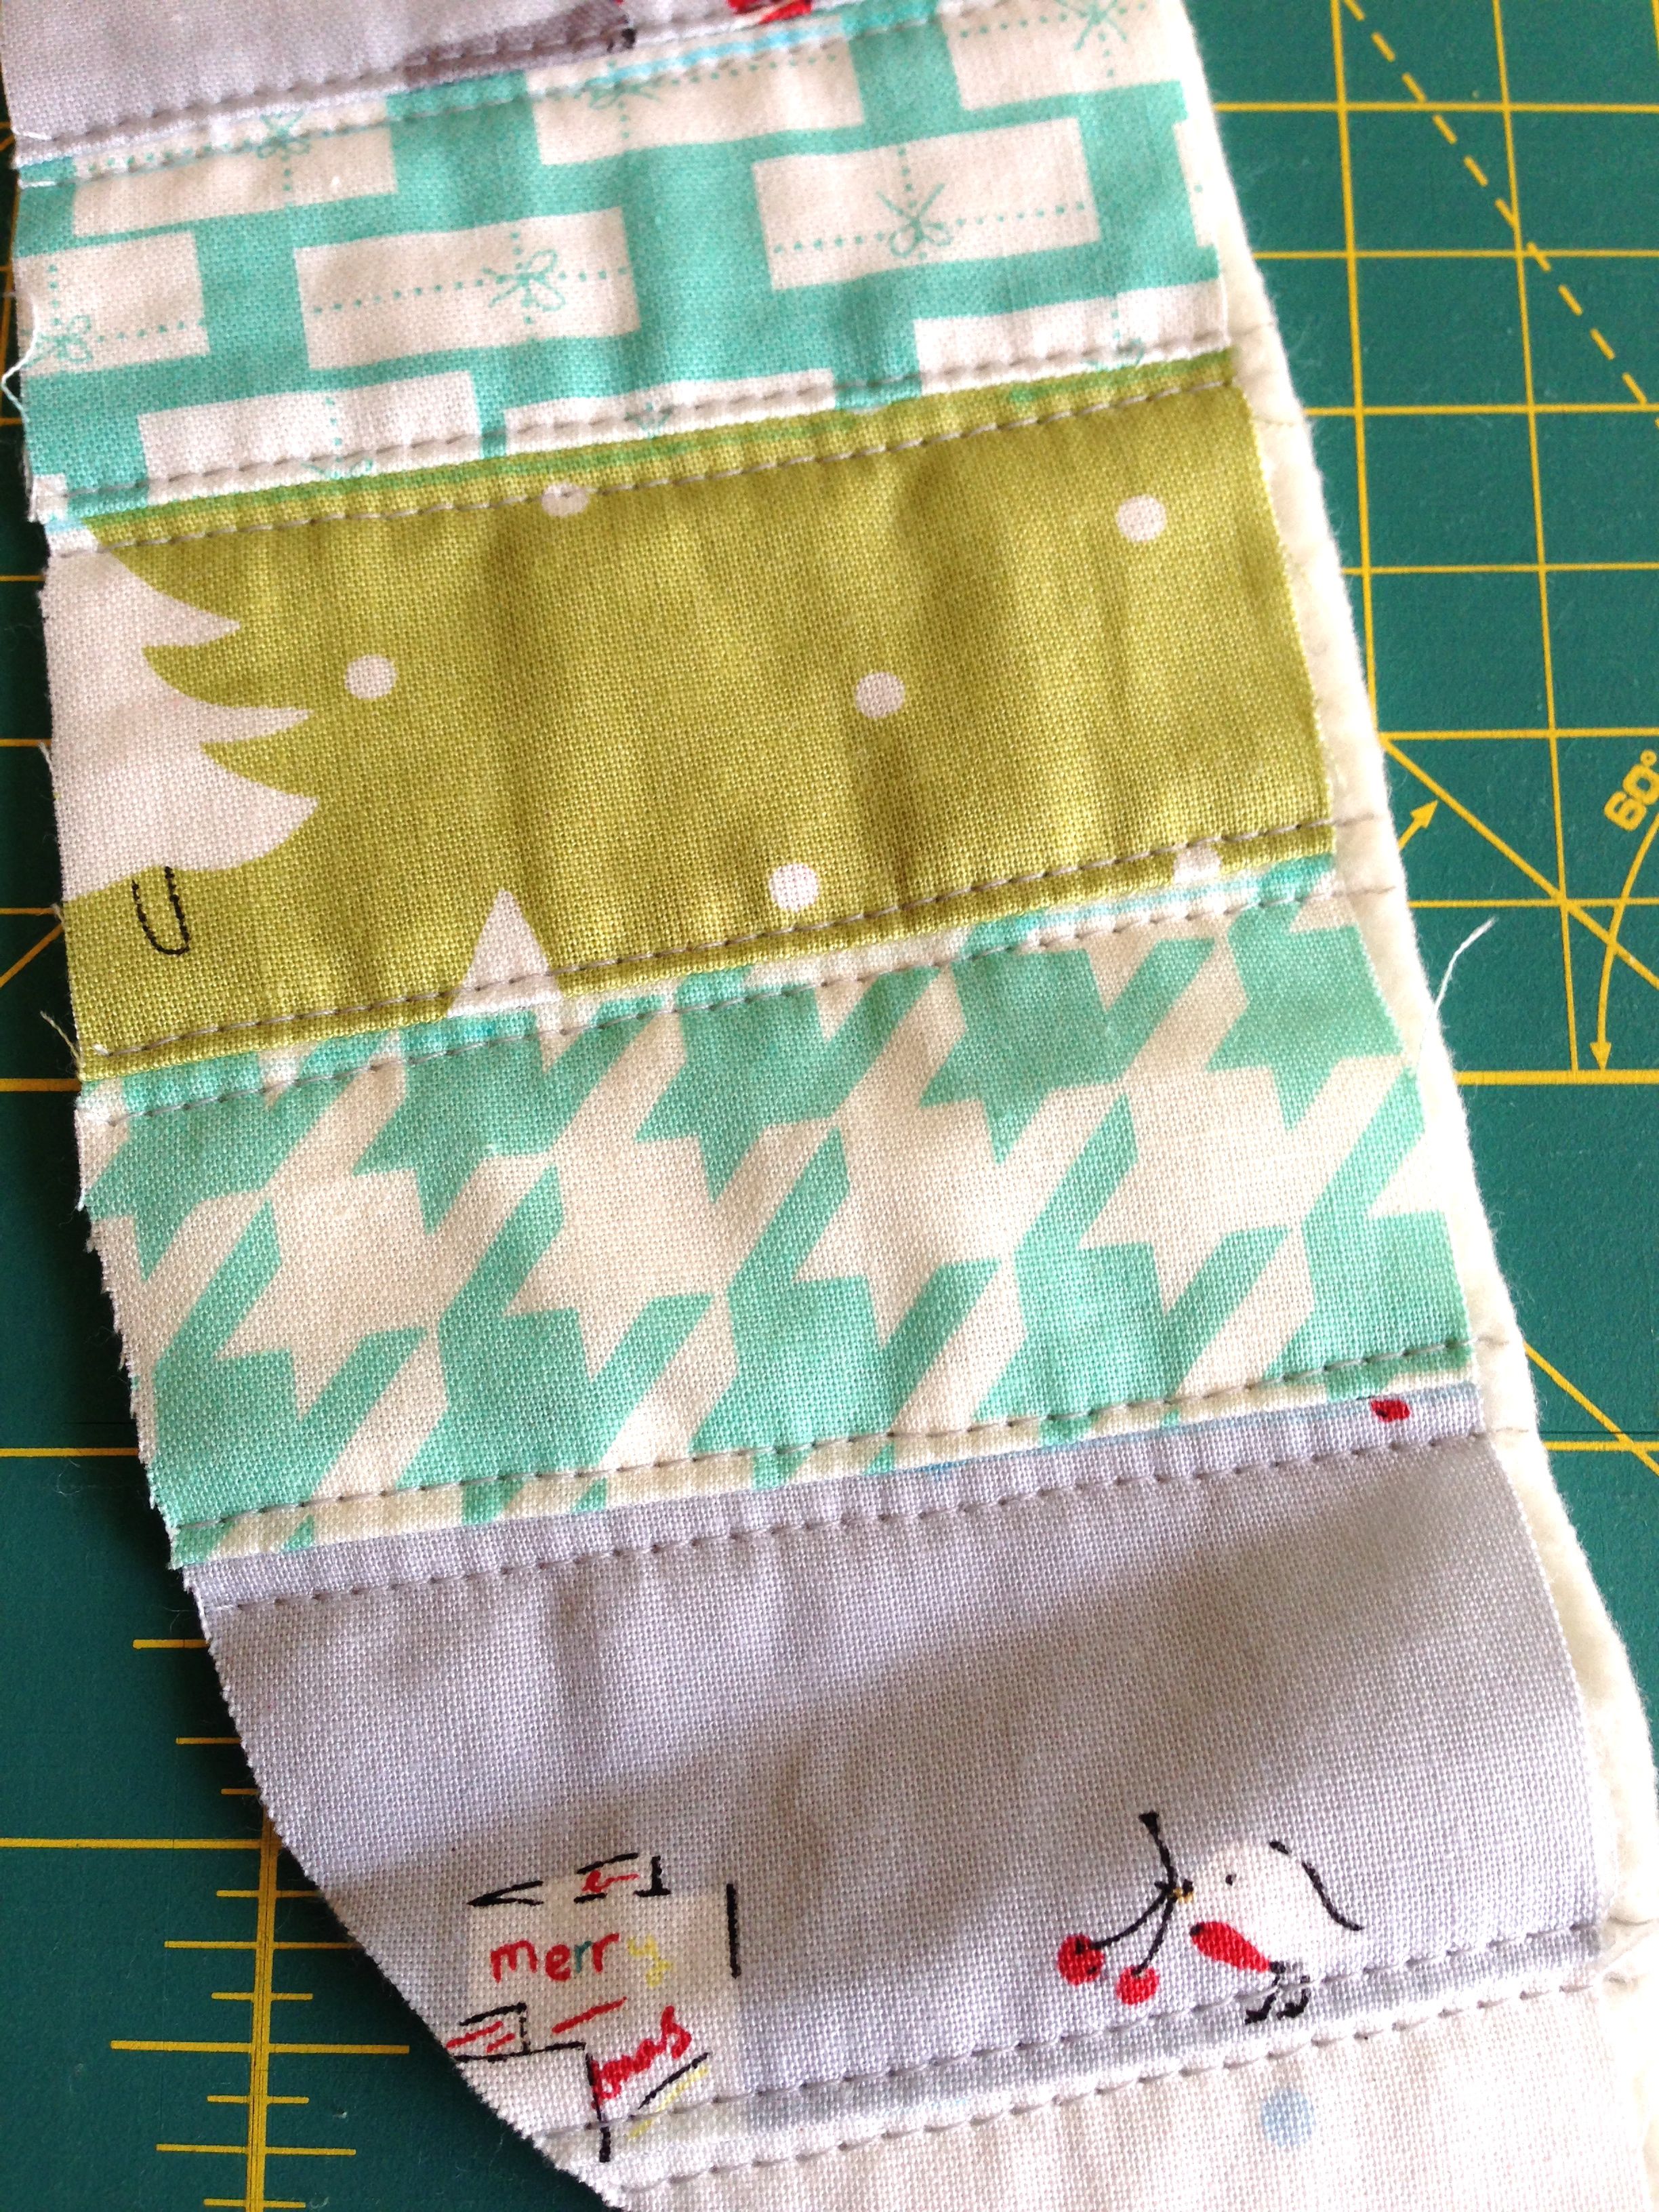
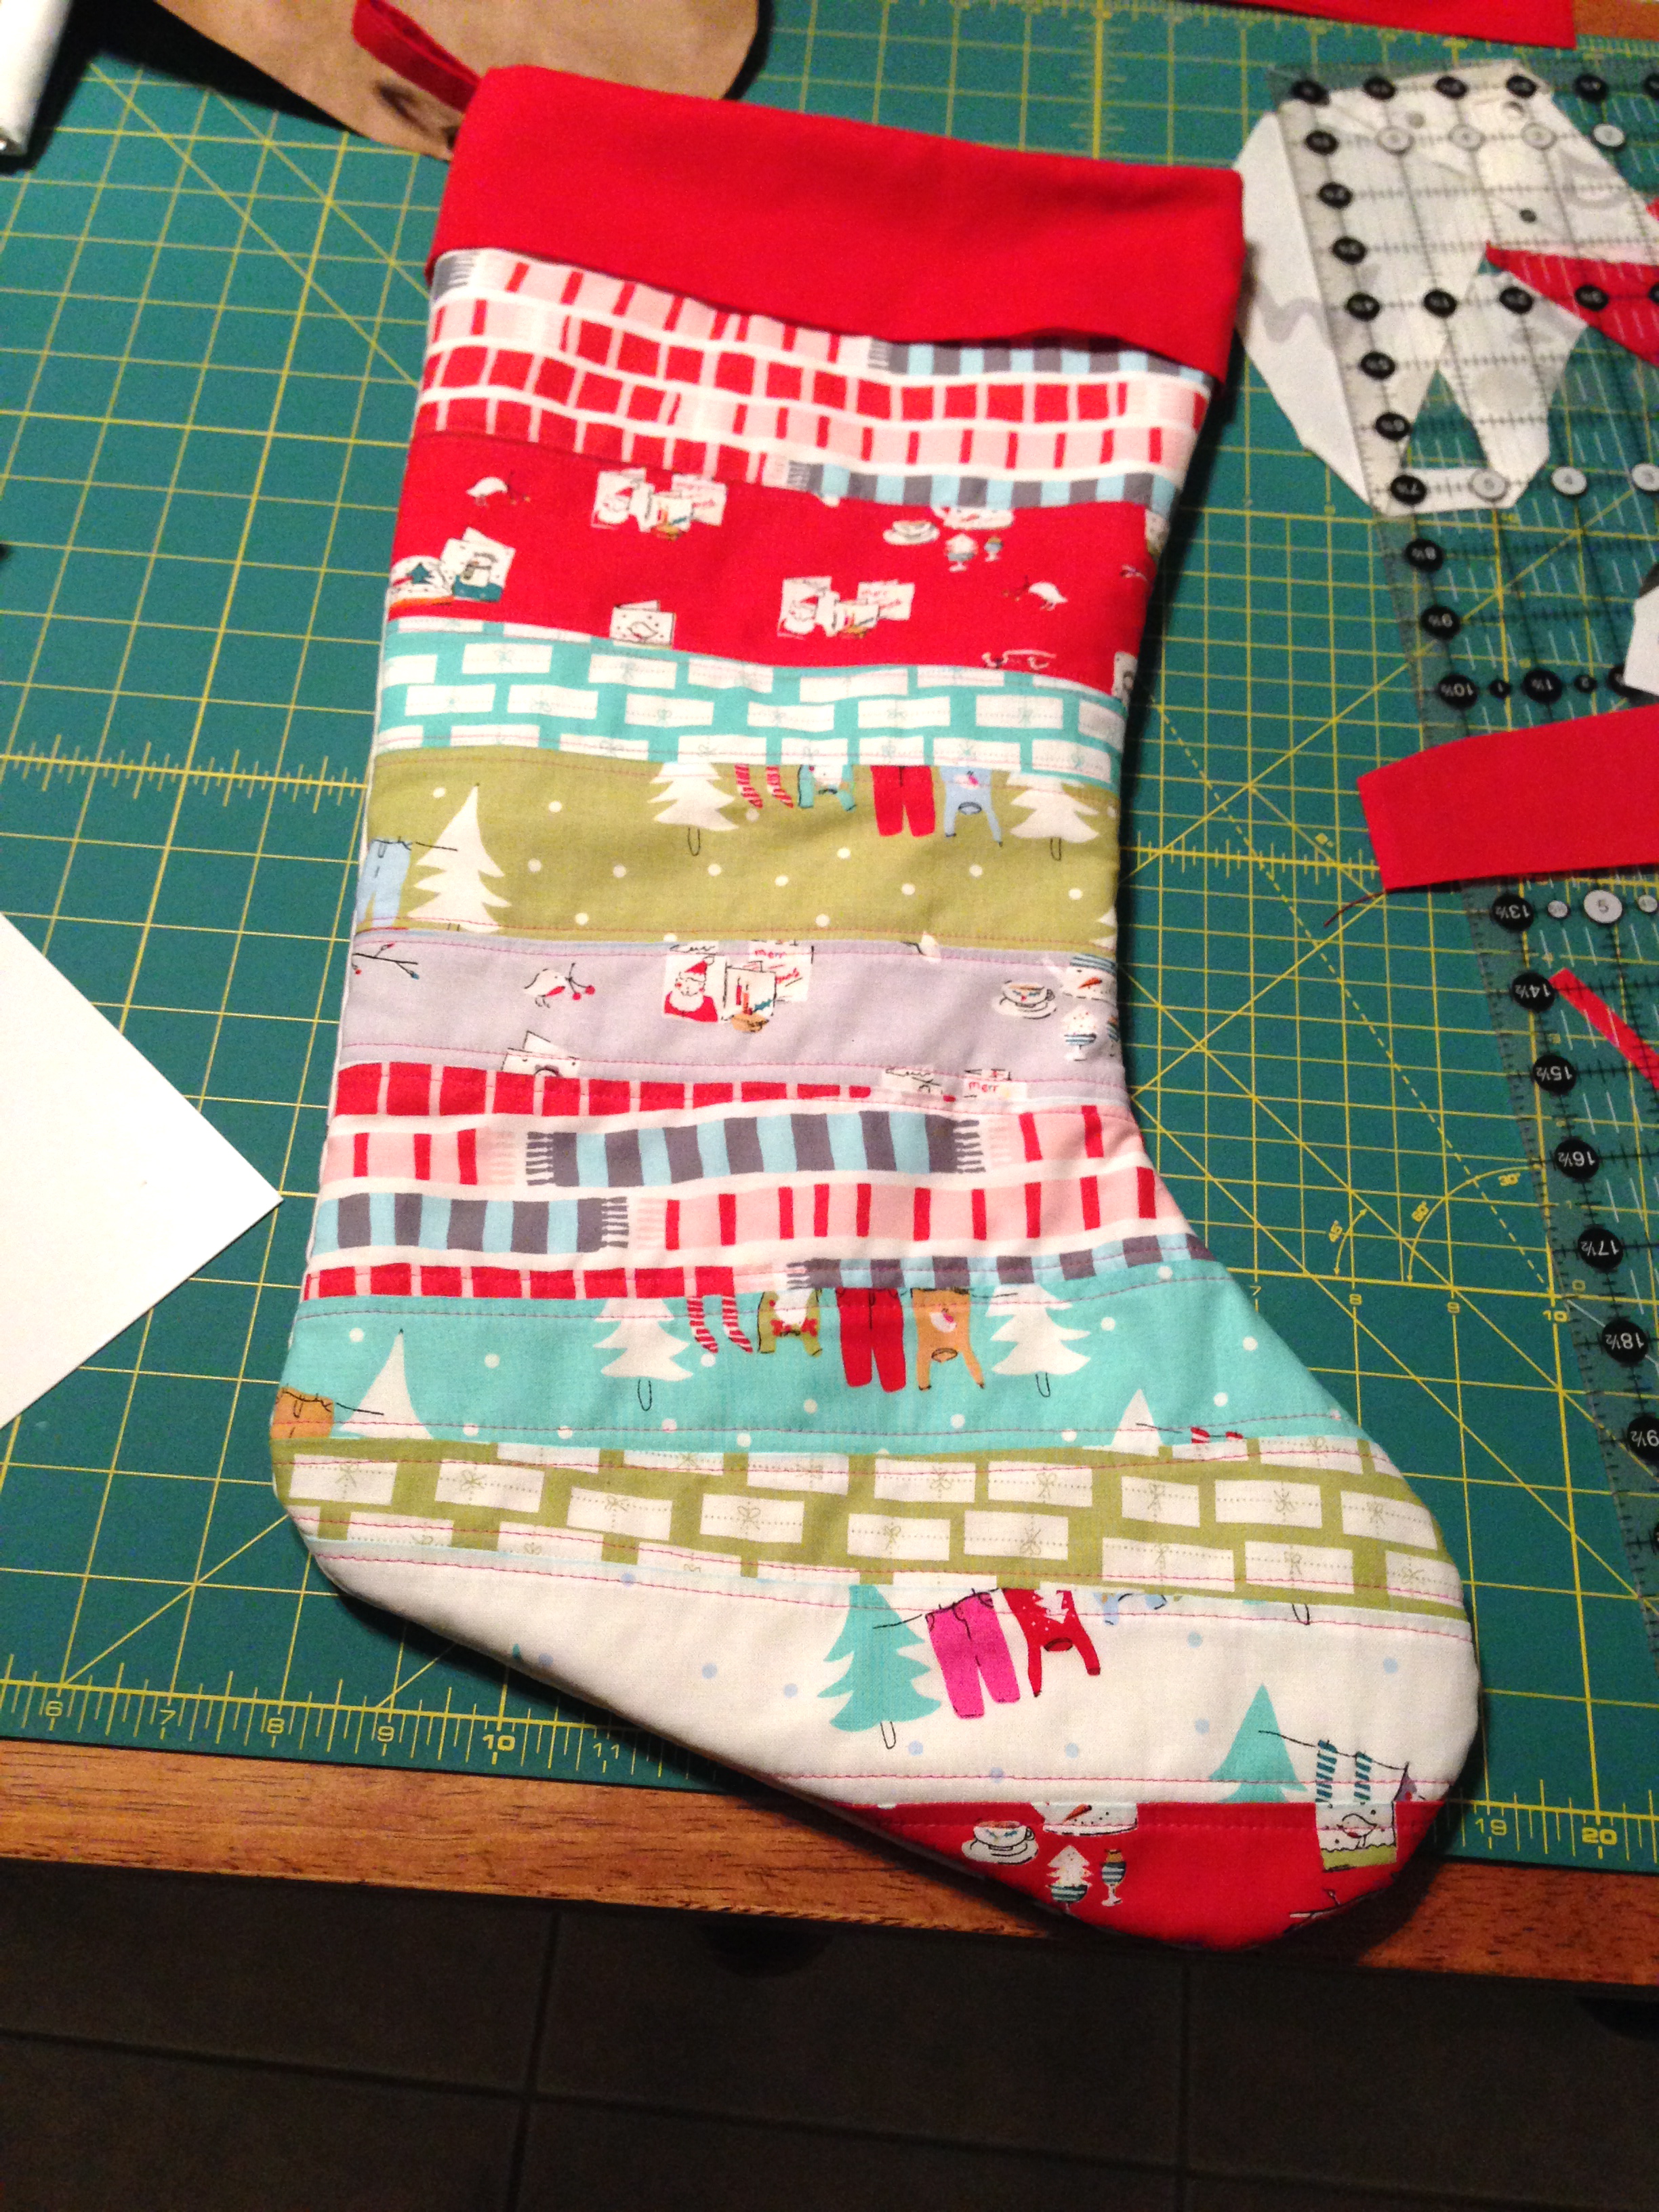
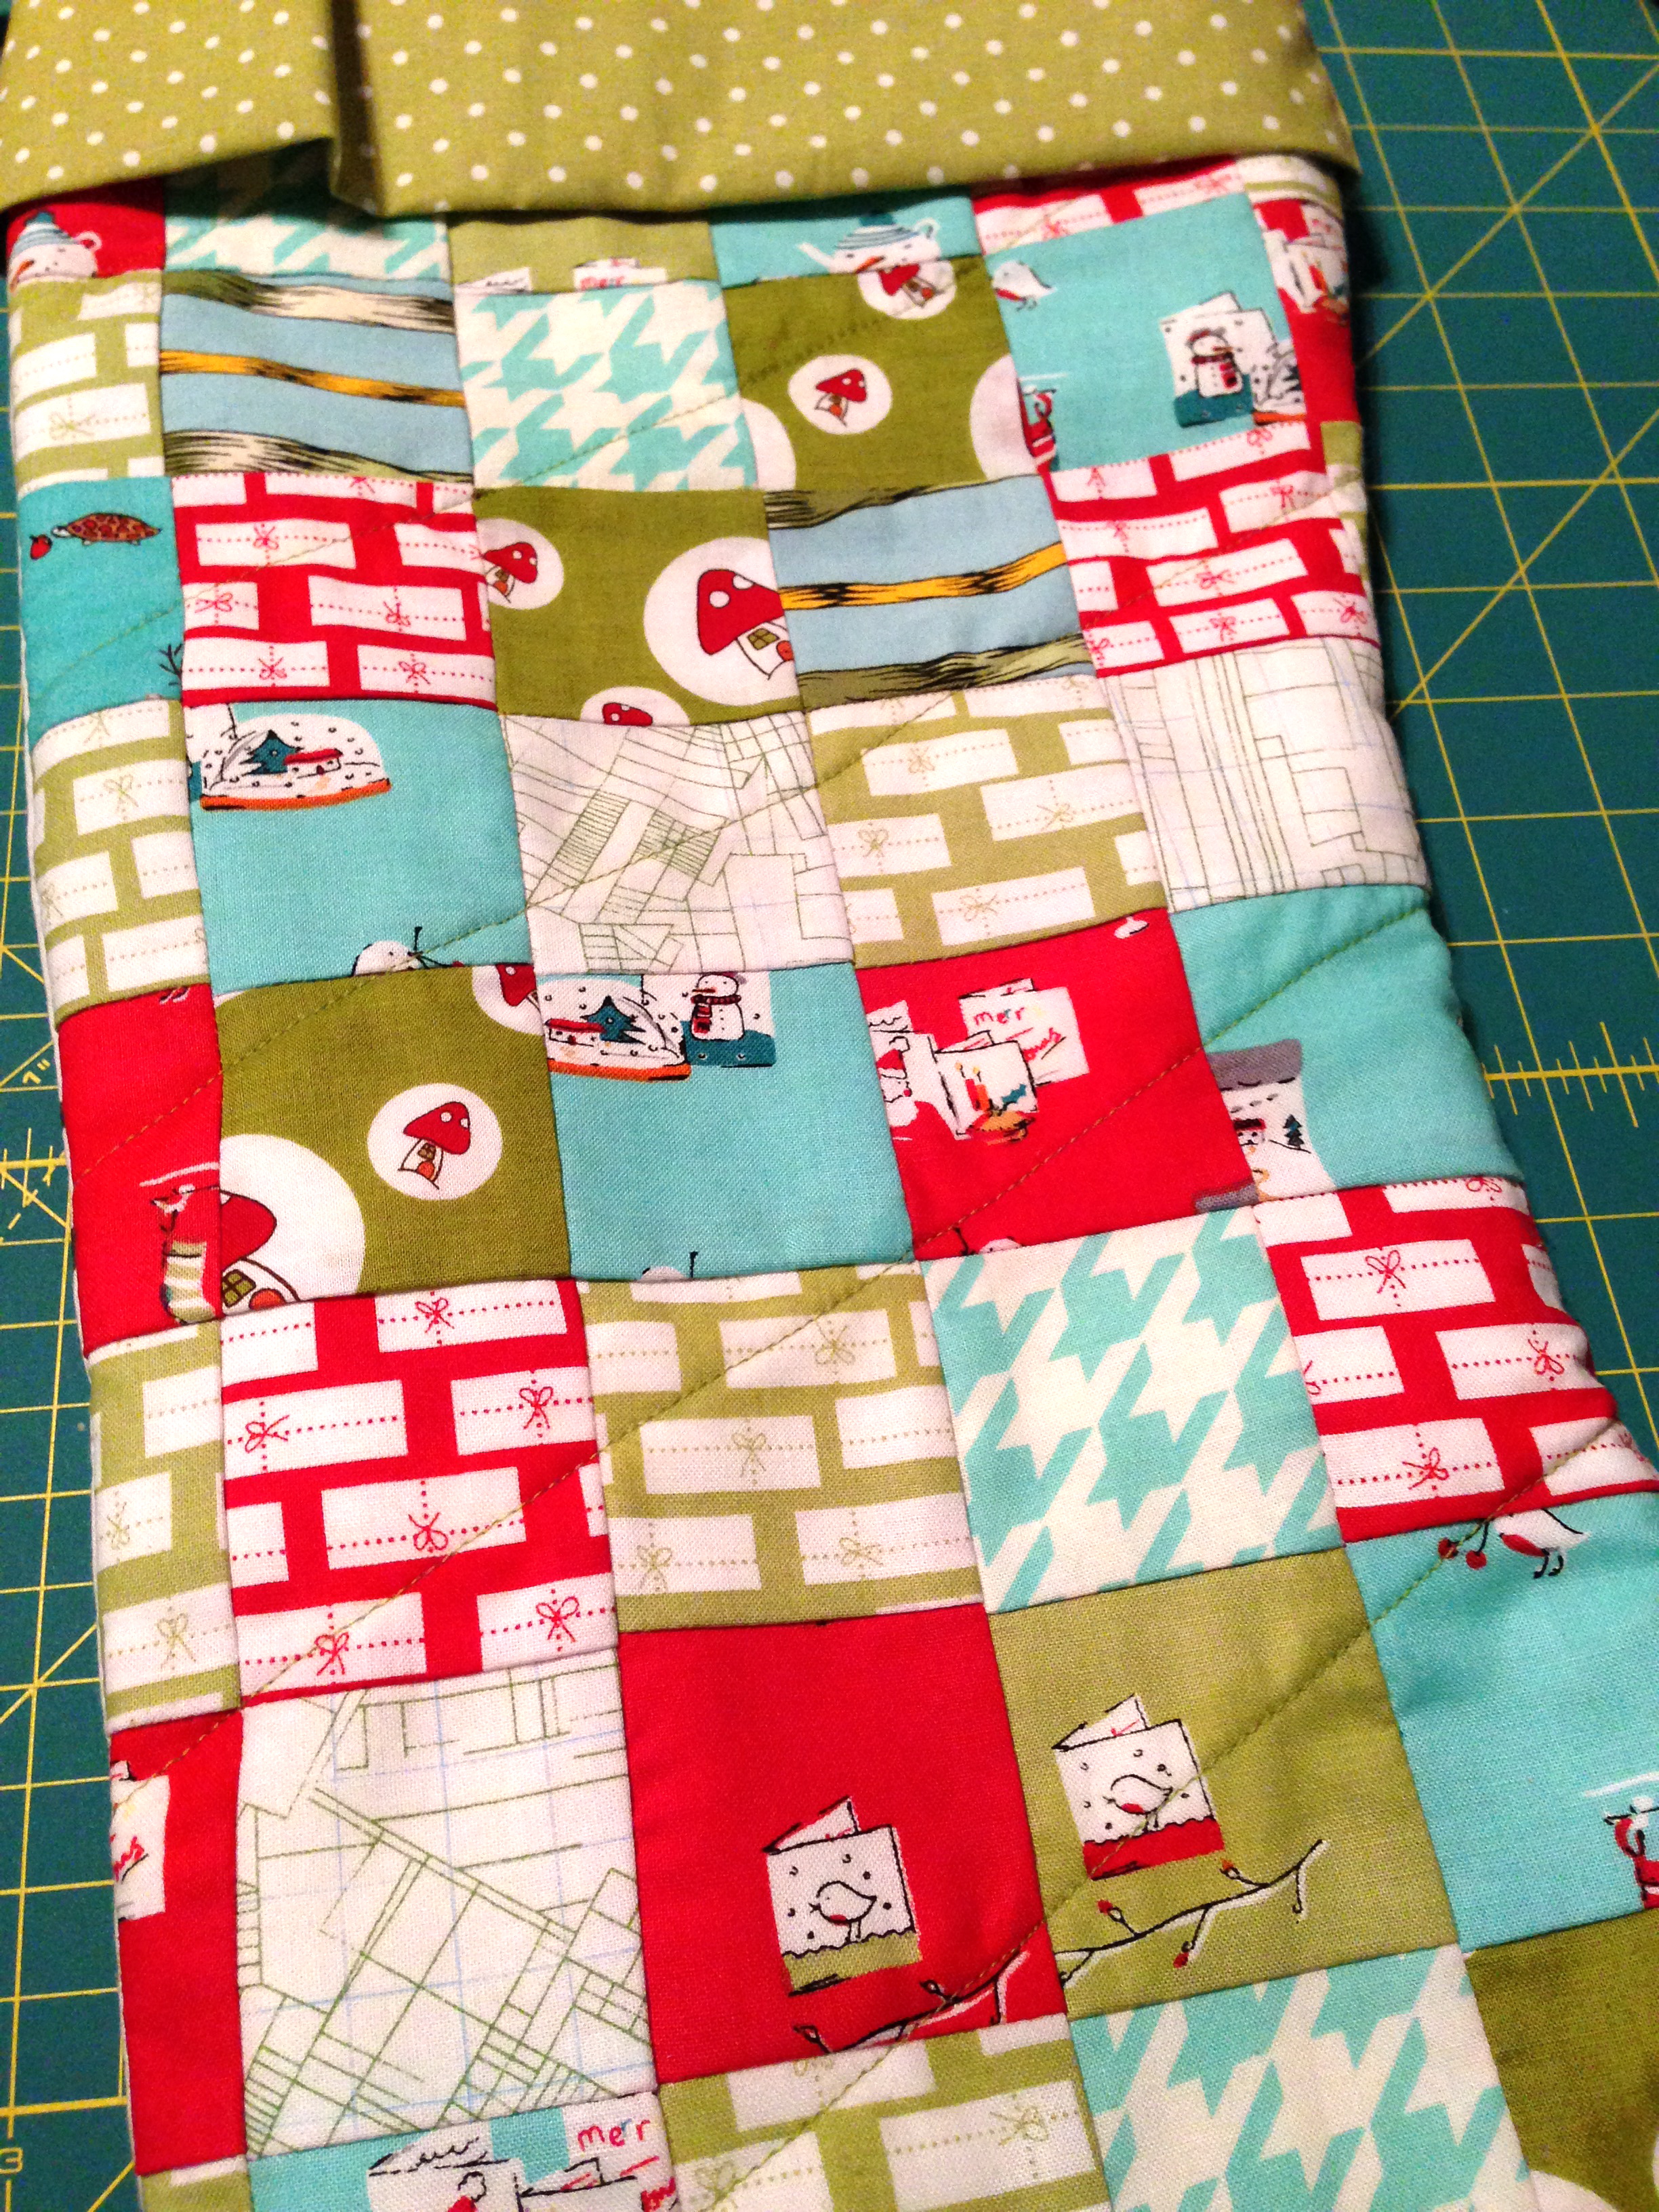
I continued to follow the tutorial, with the exception that I made my stocking quilt top only big enough for 1 stocking because I wanted each one to be different. I did 1/4″ straight line quilting on both sides of ea seam. *note that you are quilting without a back piece. The photos below are close up of my scraps showing the quilting because I didn’t take a photo of the quilt top before I cut out the pattern. Whoops

IMG_2585

IMG_2586(I forgot to take a photo of the paper bag template on top of the quilted stocking piece. Sorry!)

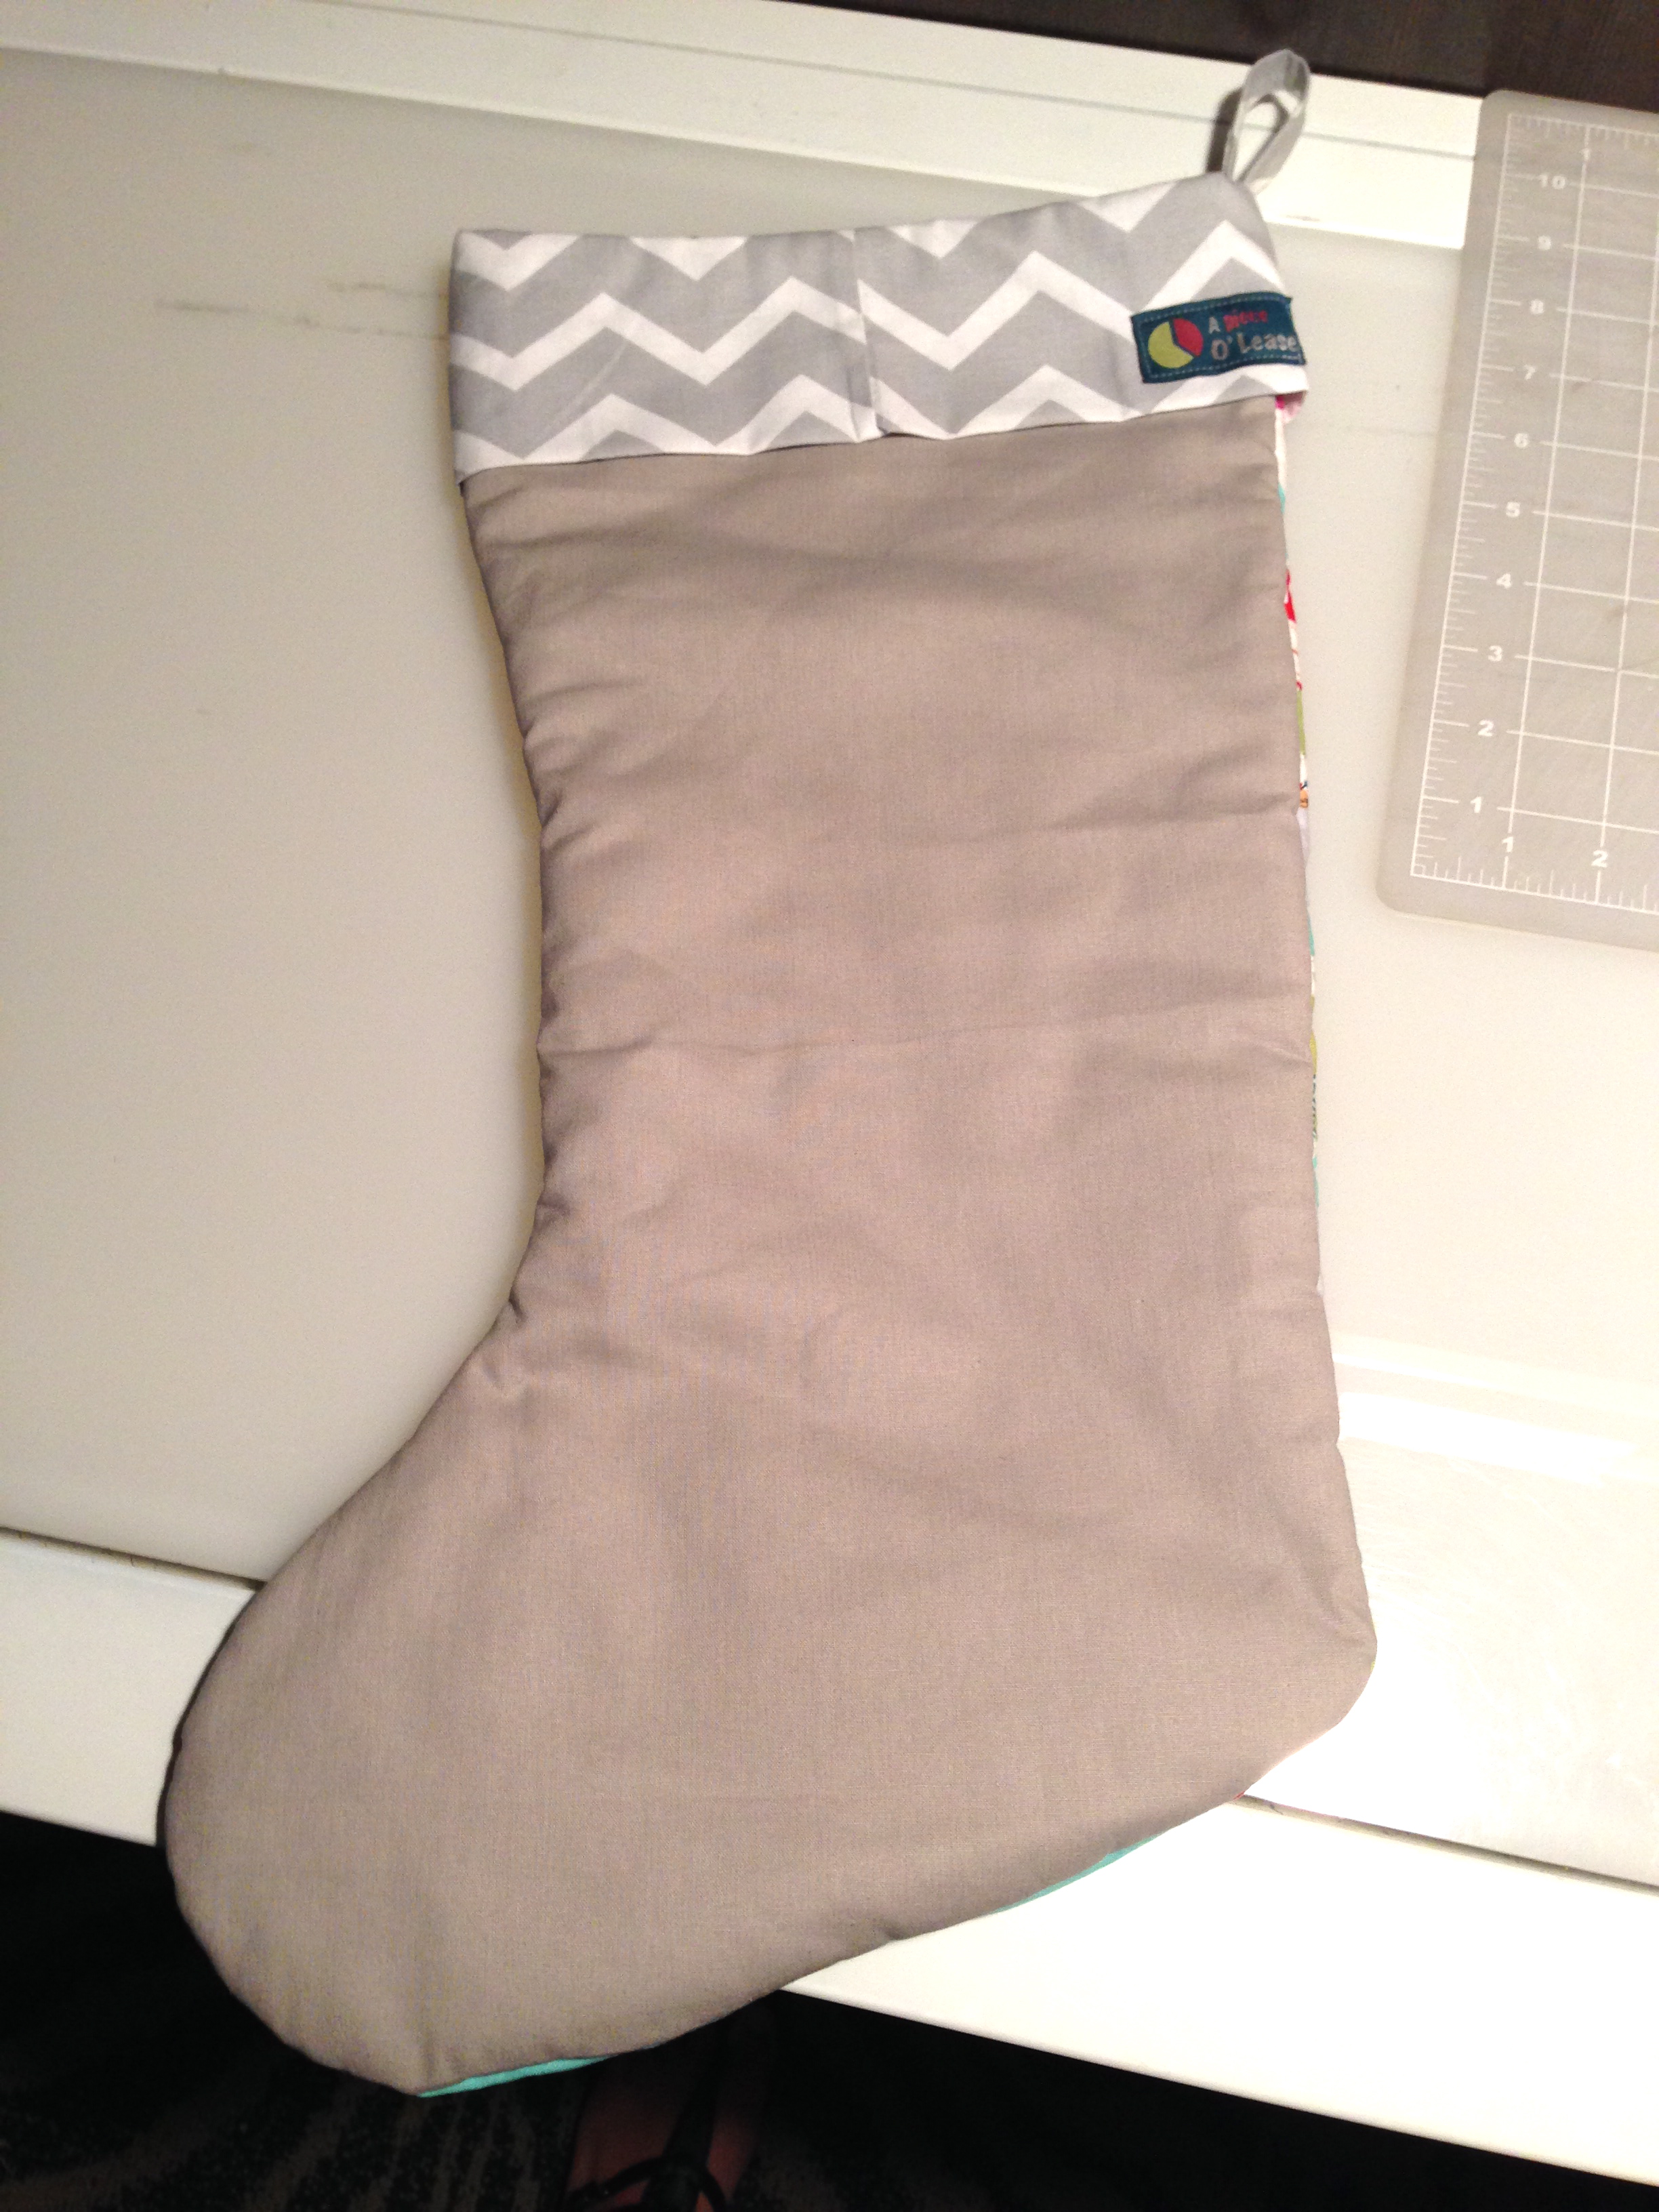
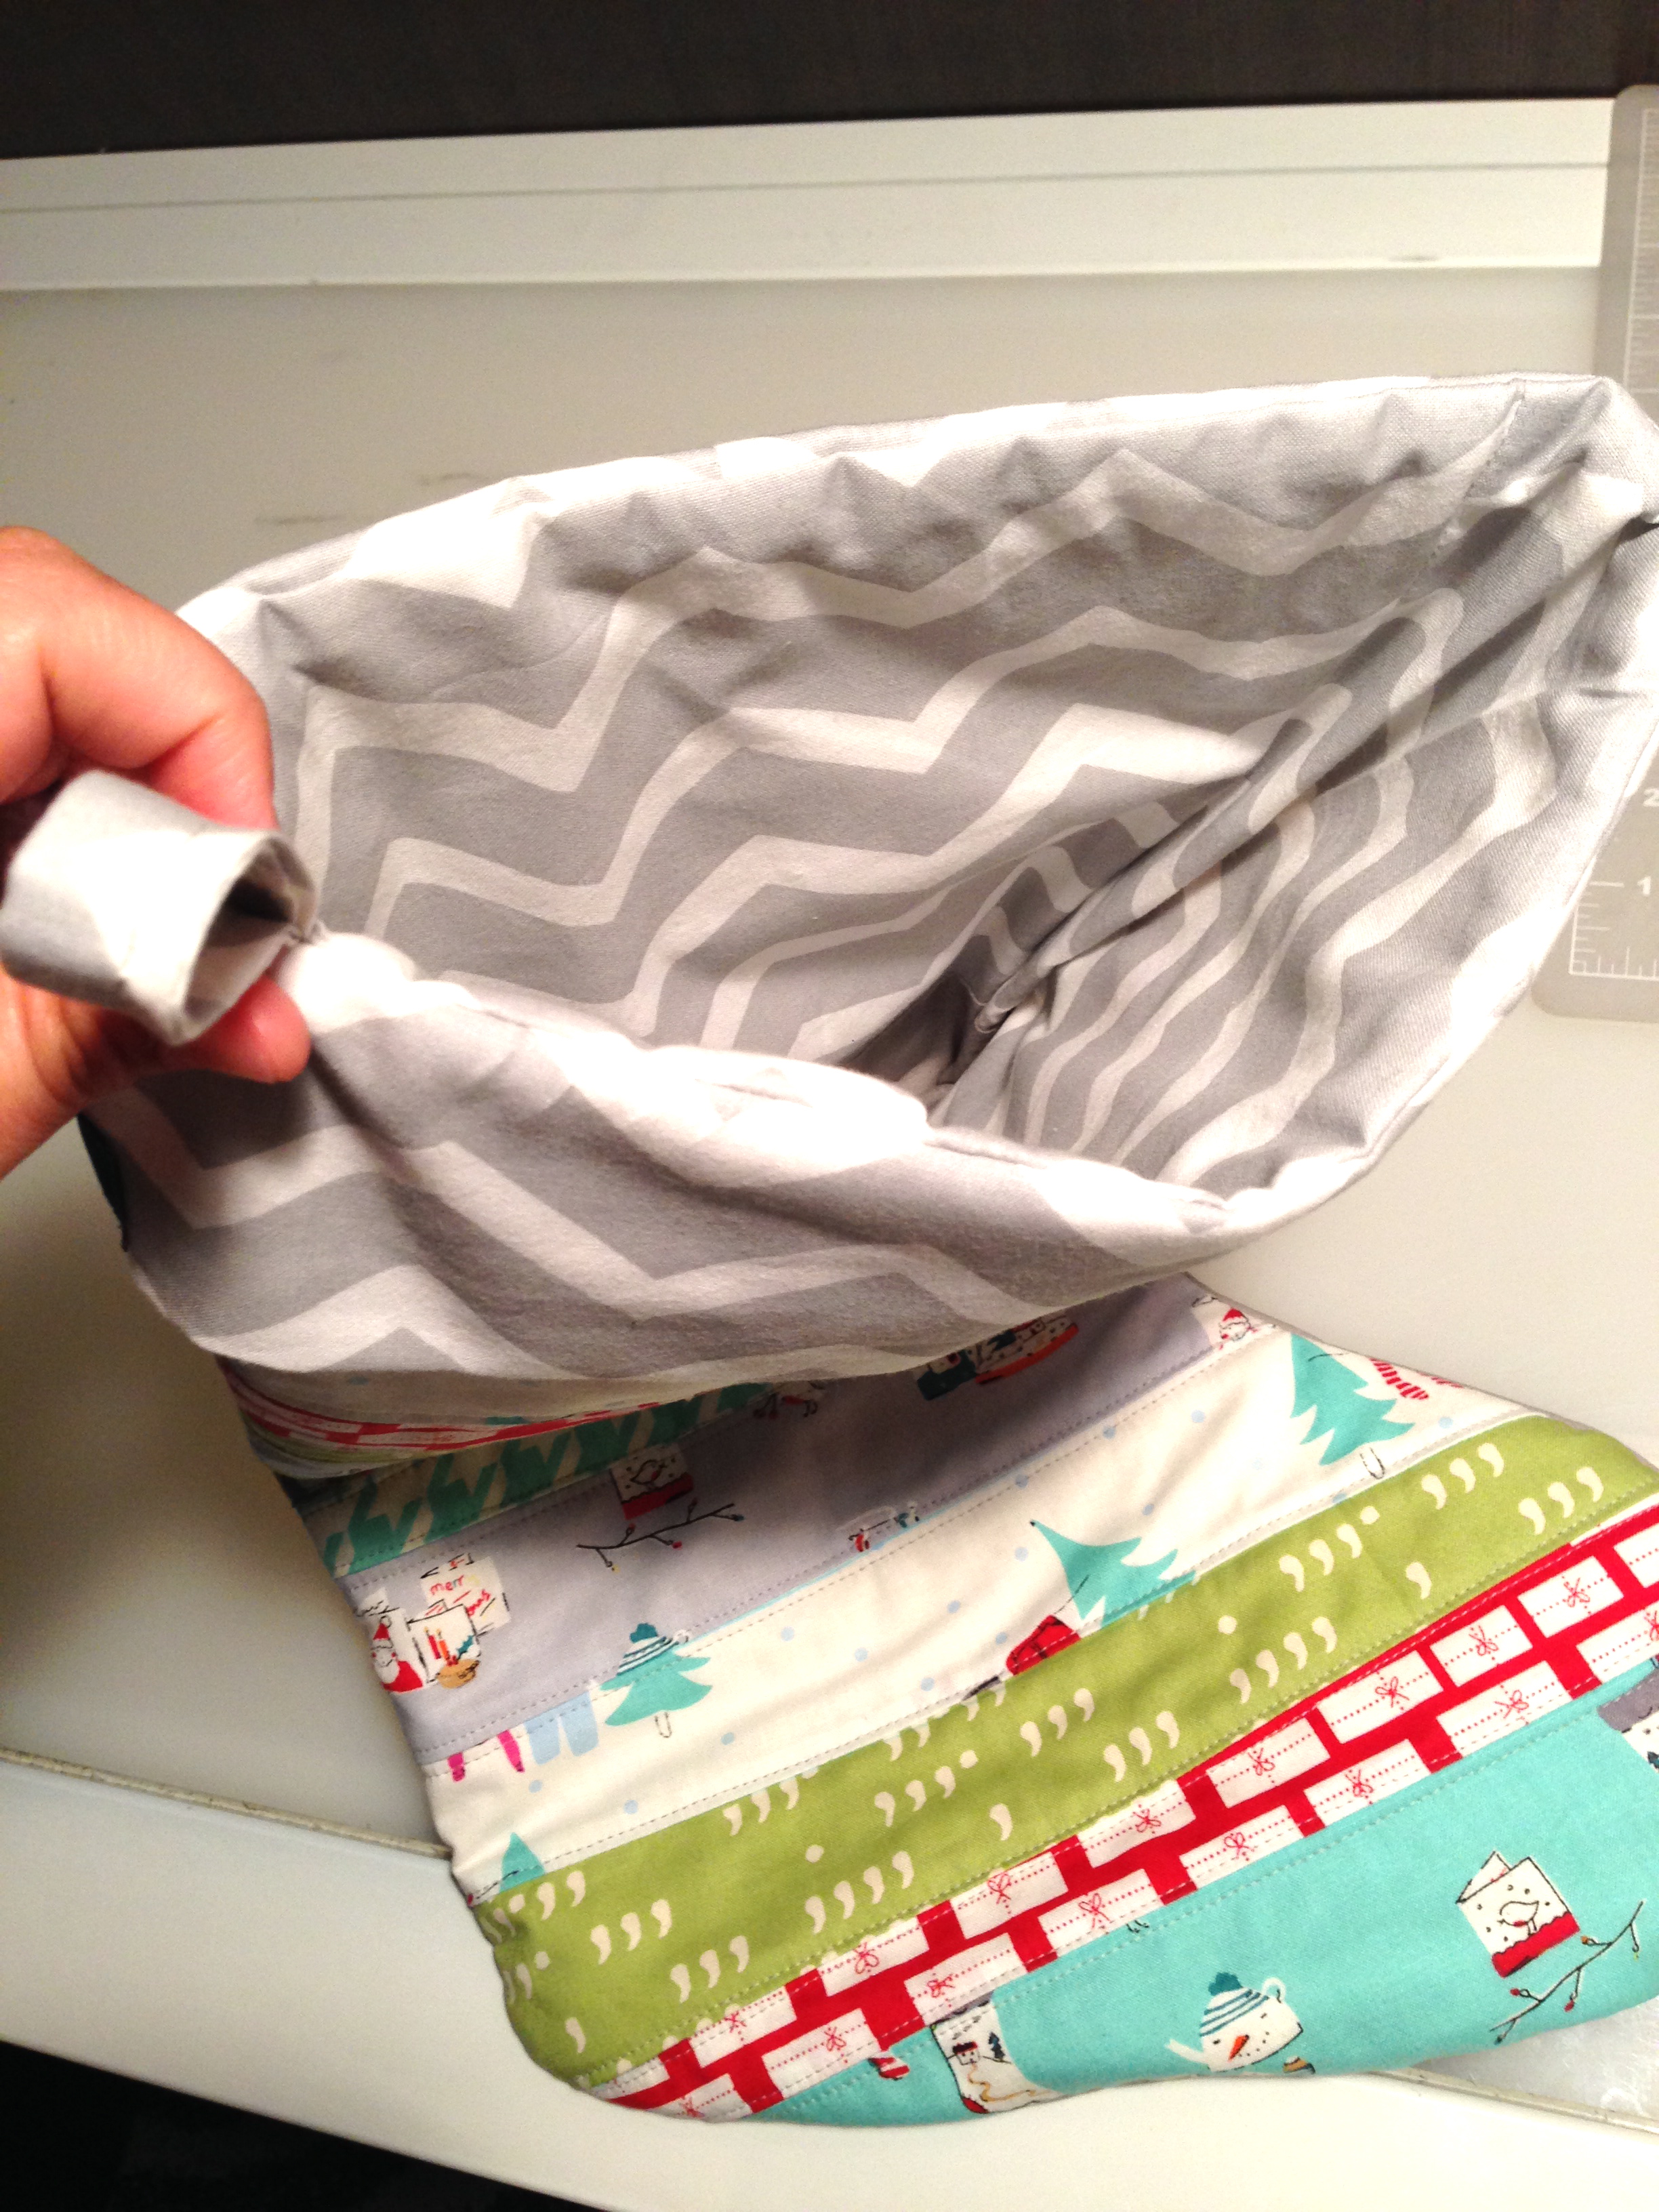
Next I cut out my inside lining pieces as described in the tutorial. The only thing I did different was that I wanted half of my lining to be the same as the cuff so that it flowed together. I sewed some of the cuff fabric to the top of my lining piece and then used the paper bag template to cut the shape out. I hope that made sense.

IMG_1419

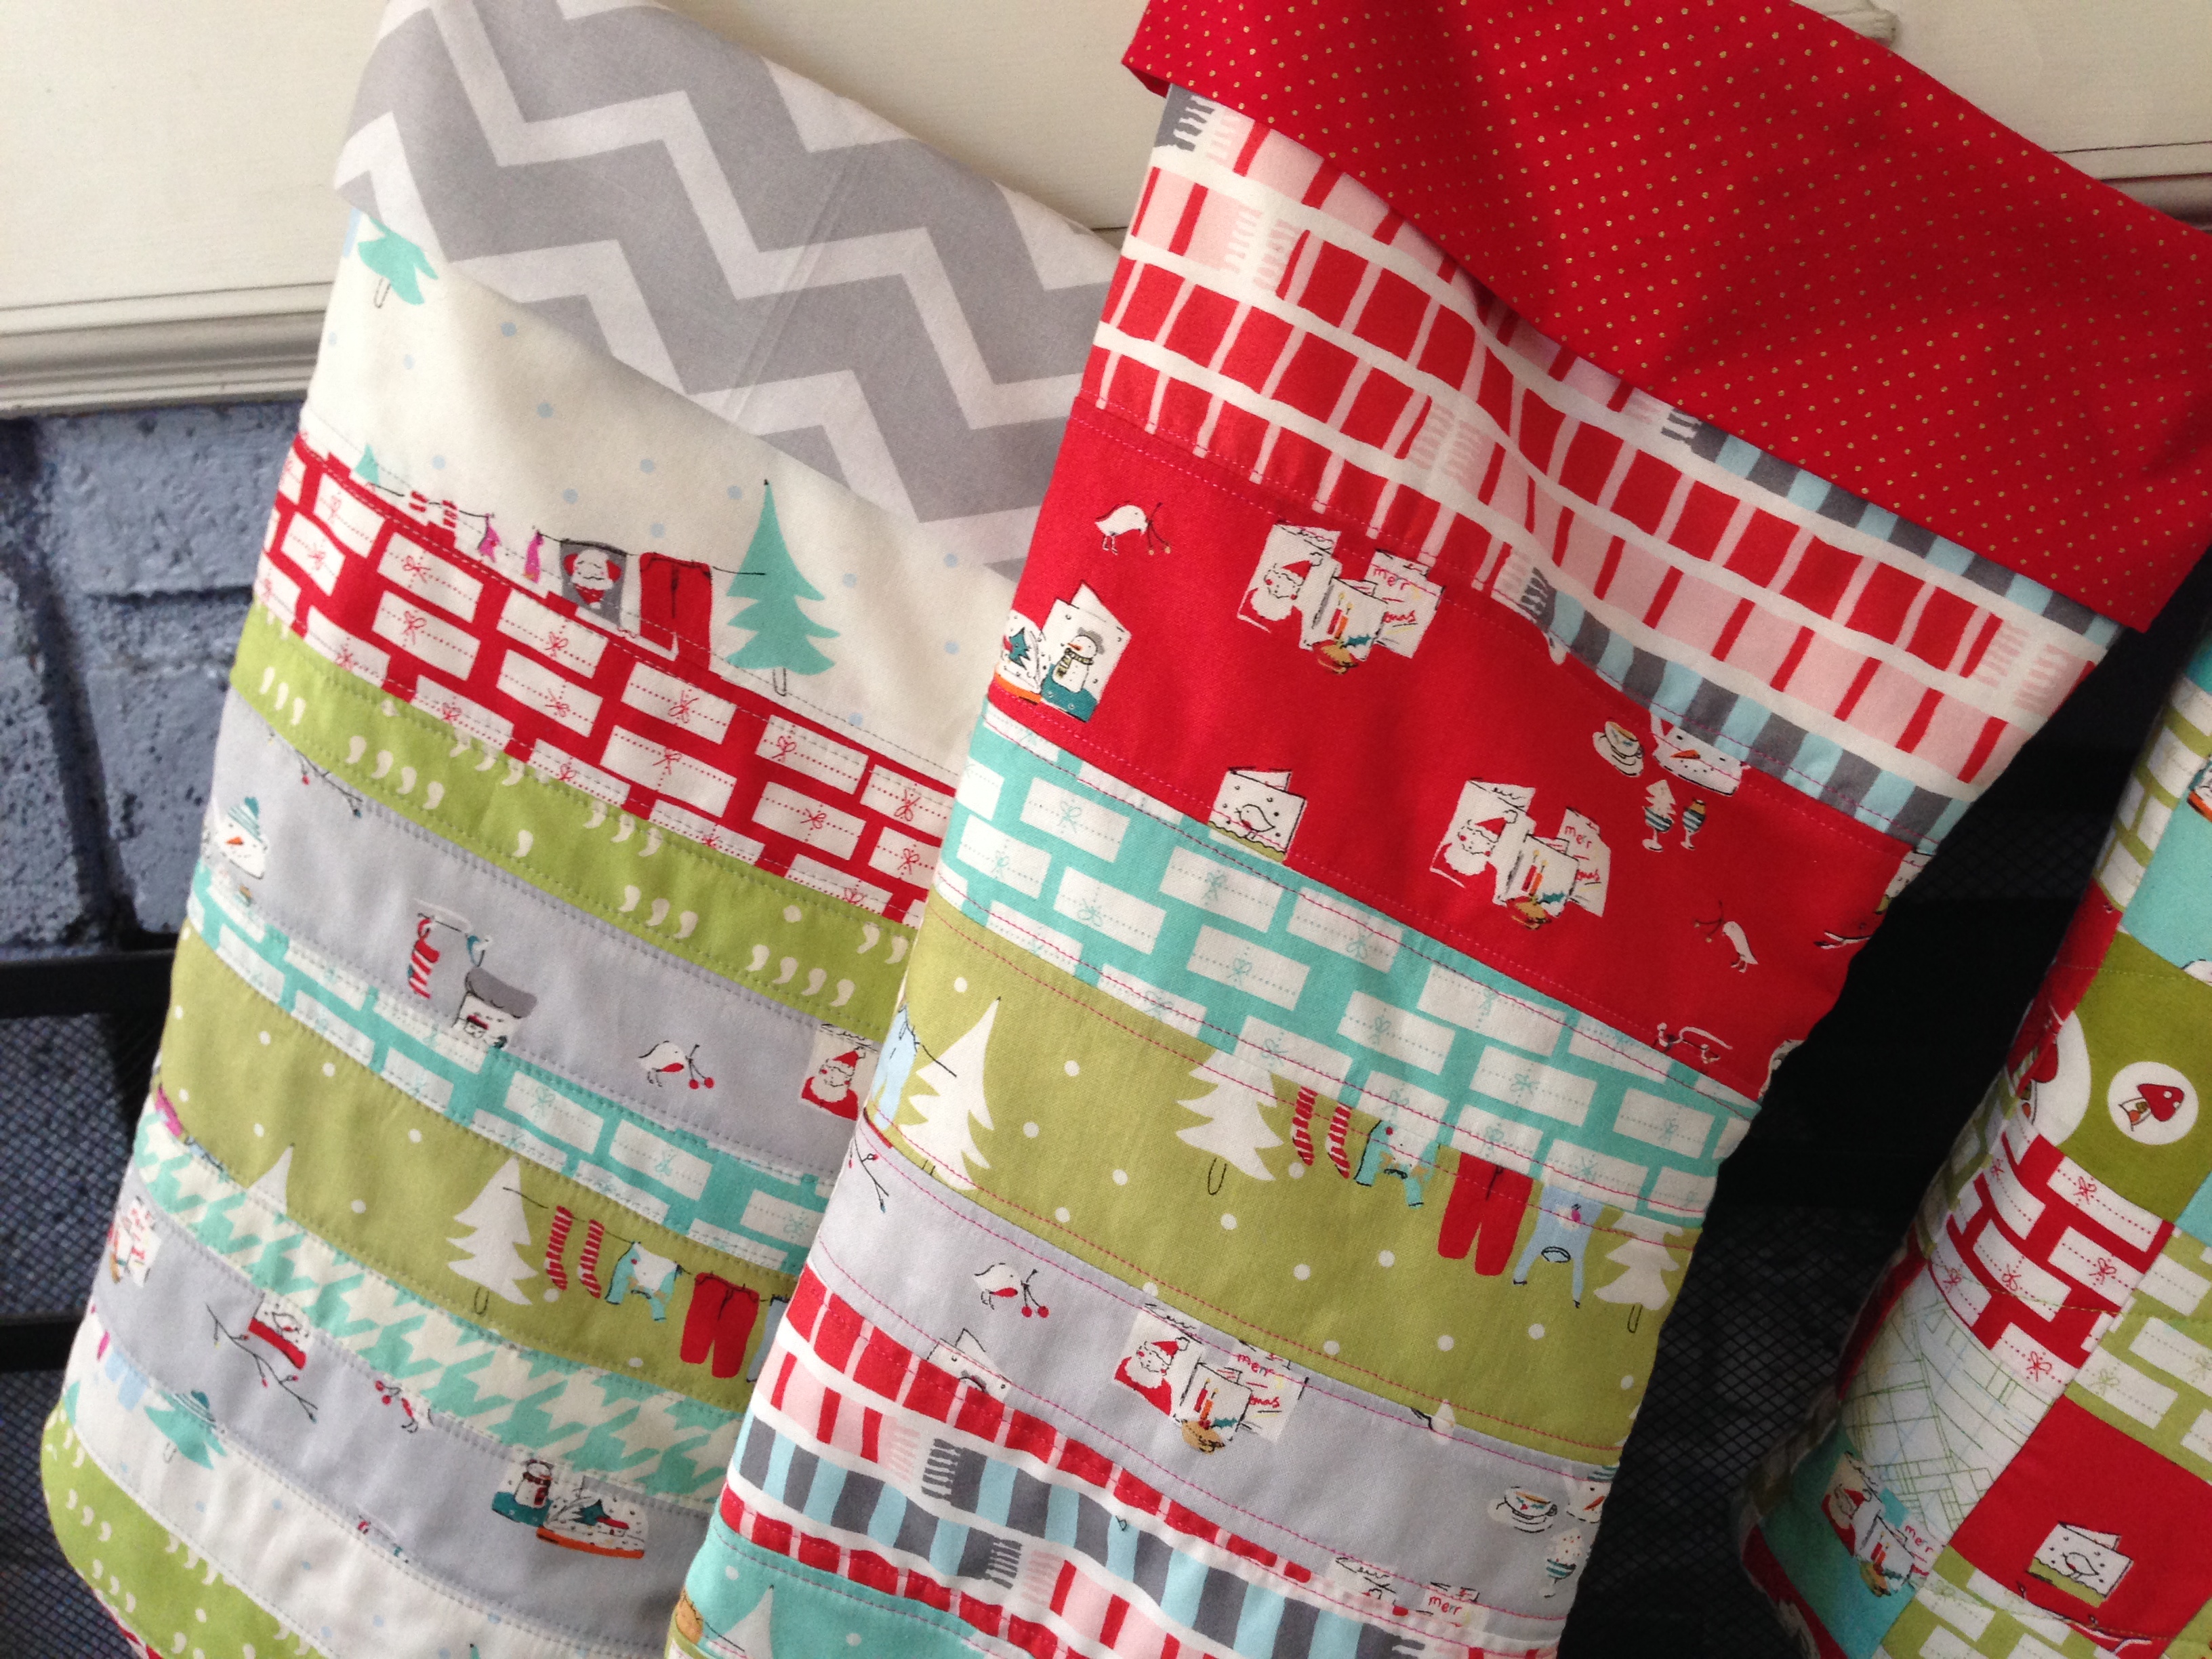
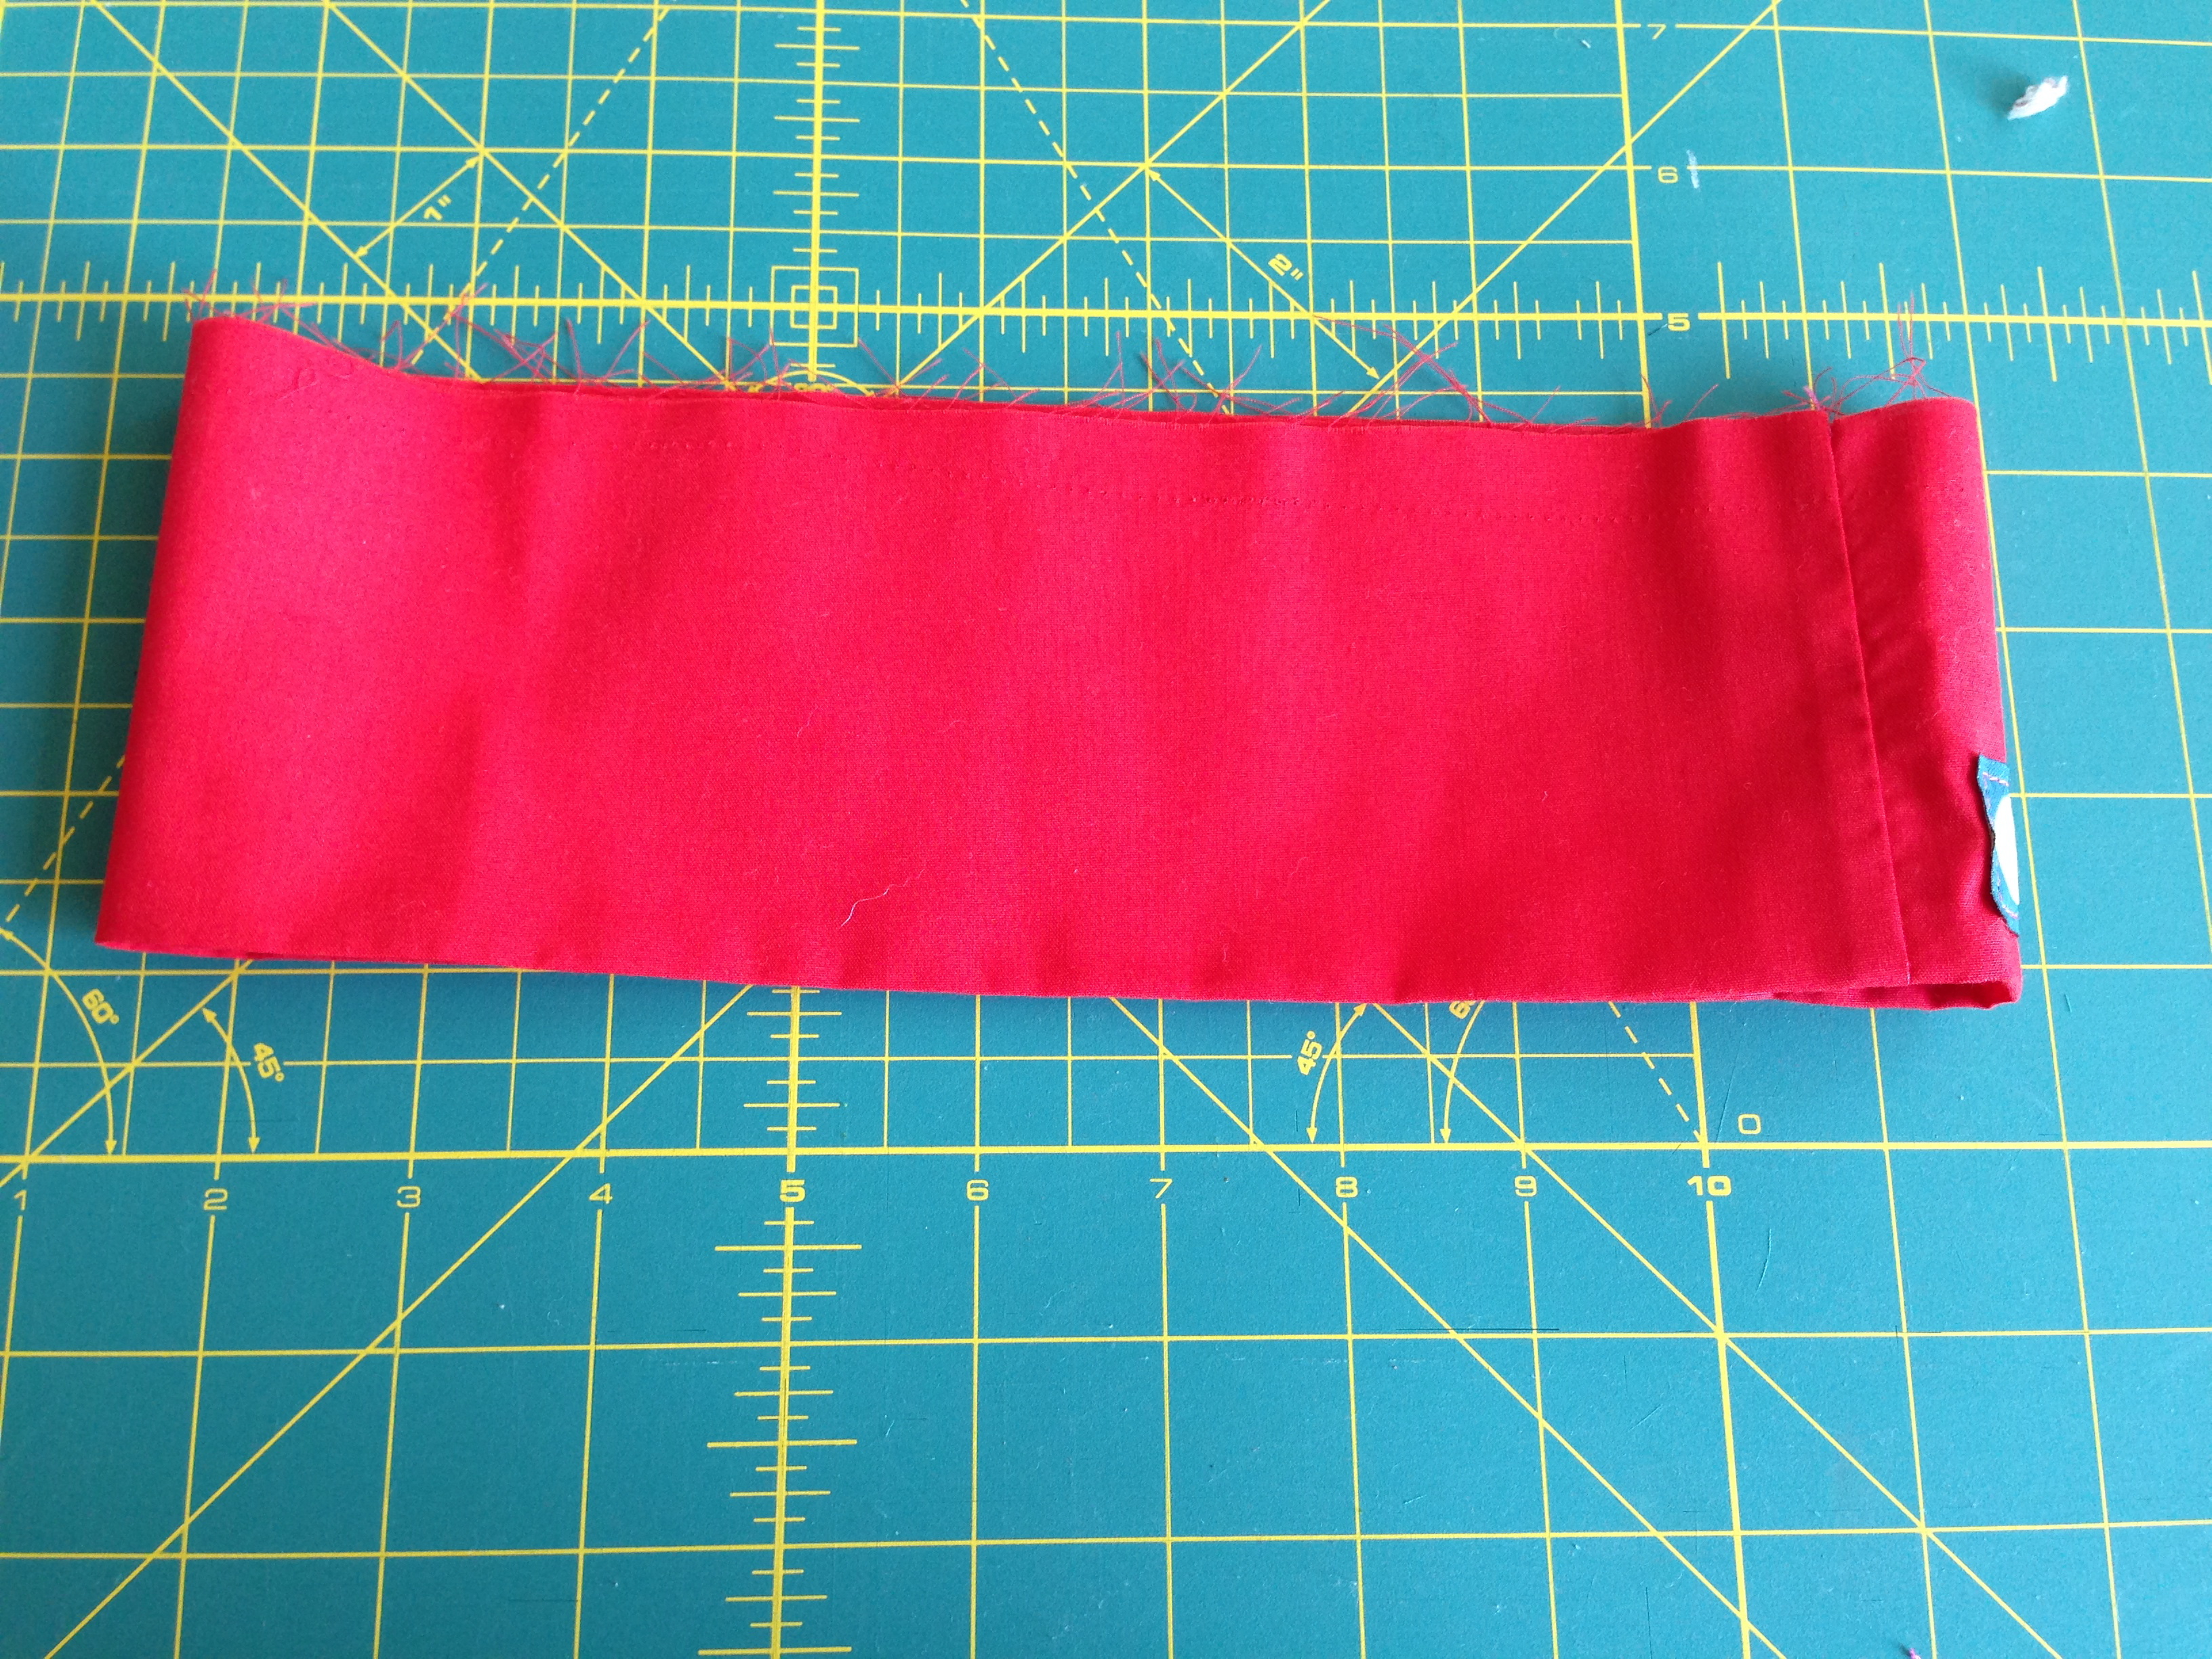
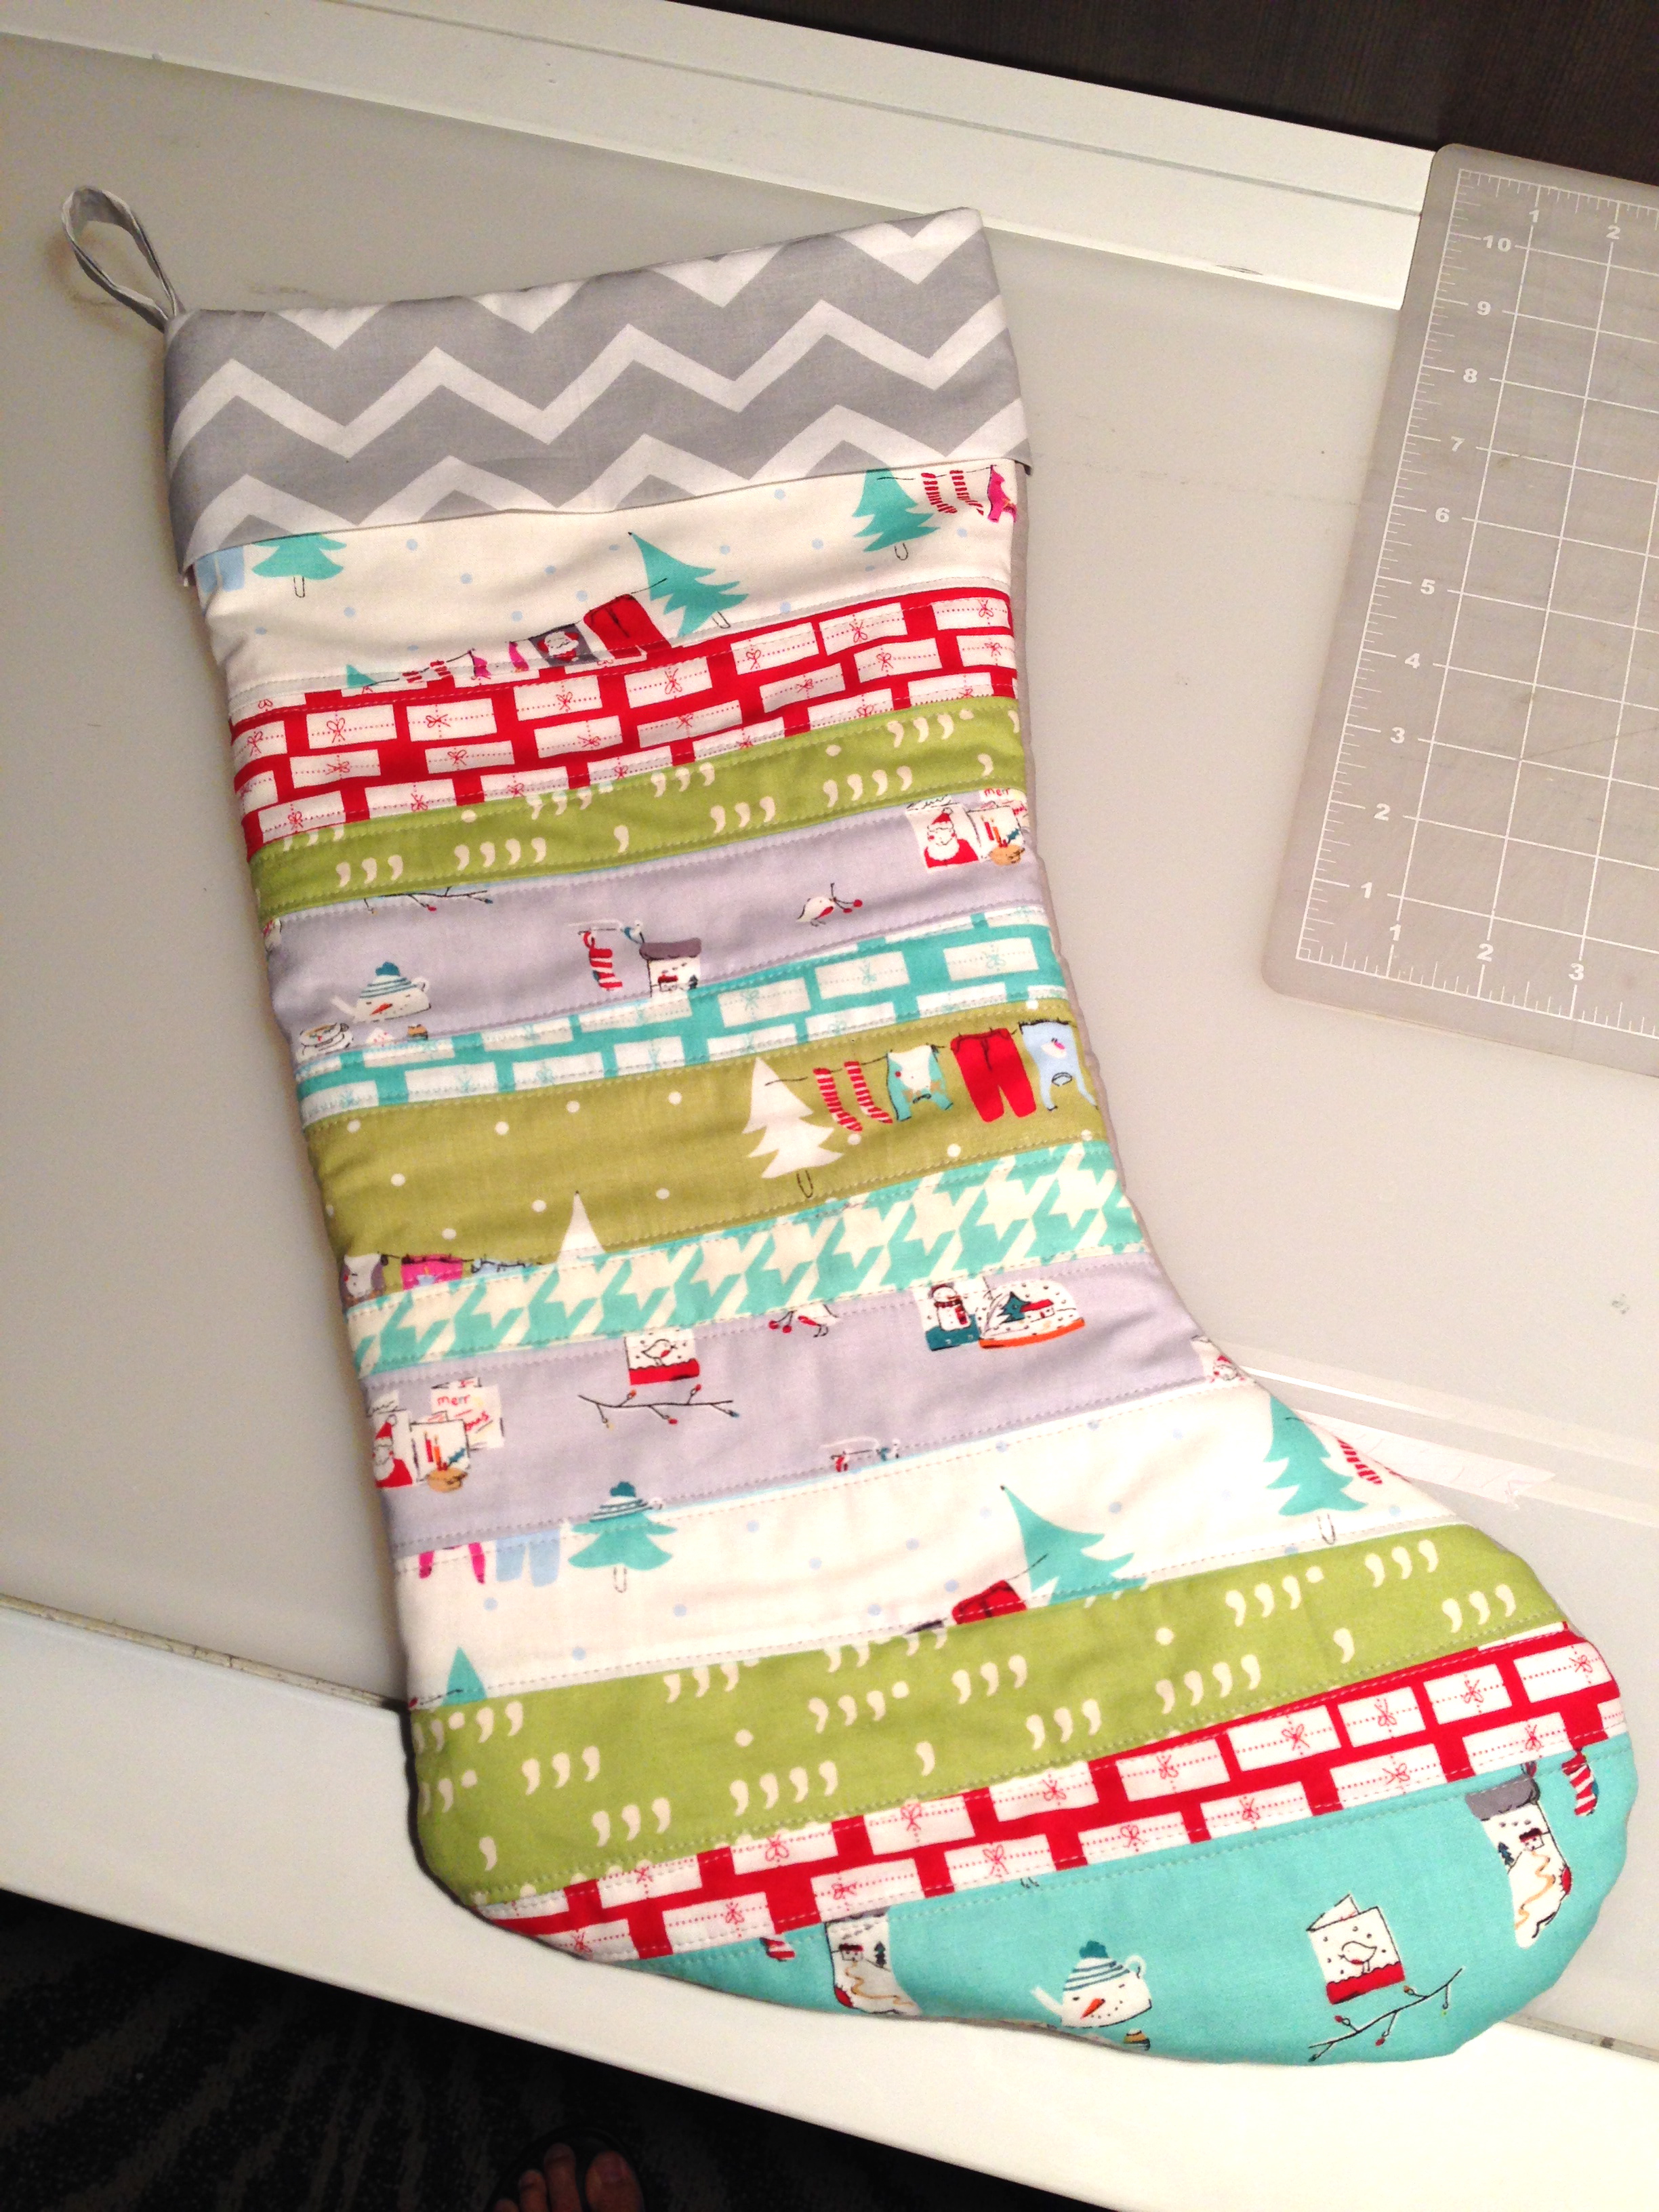
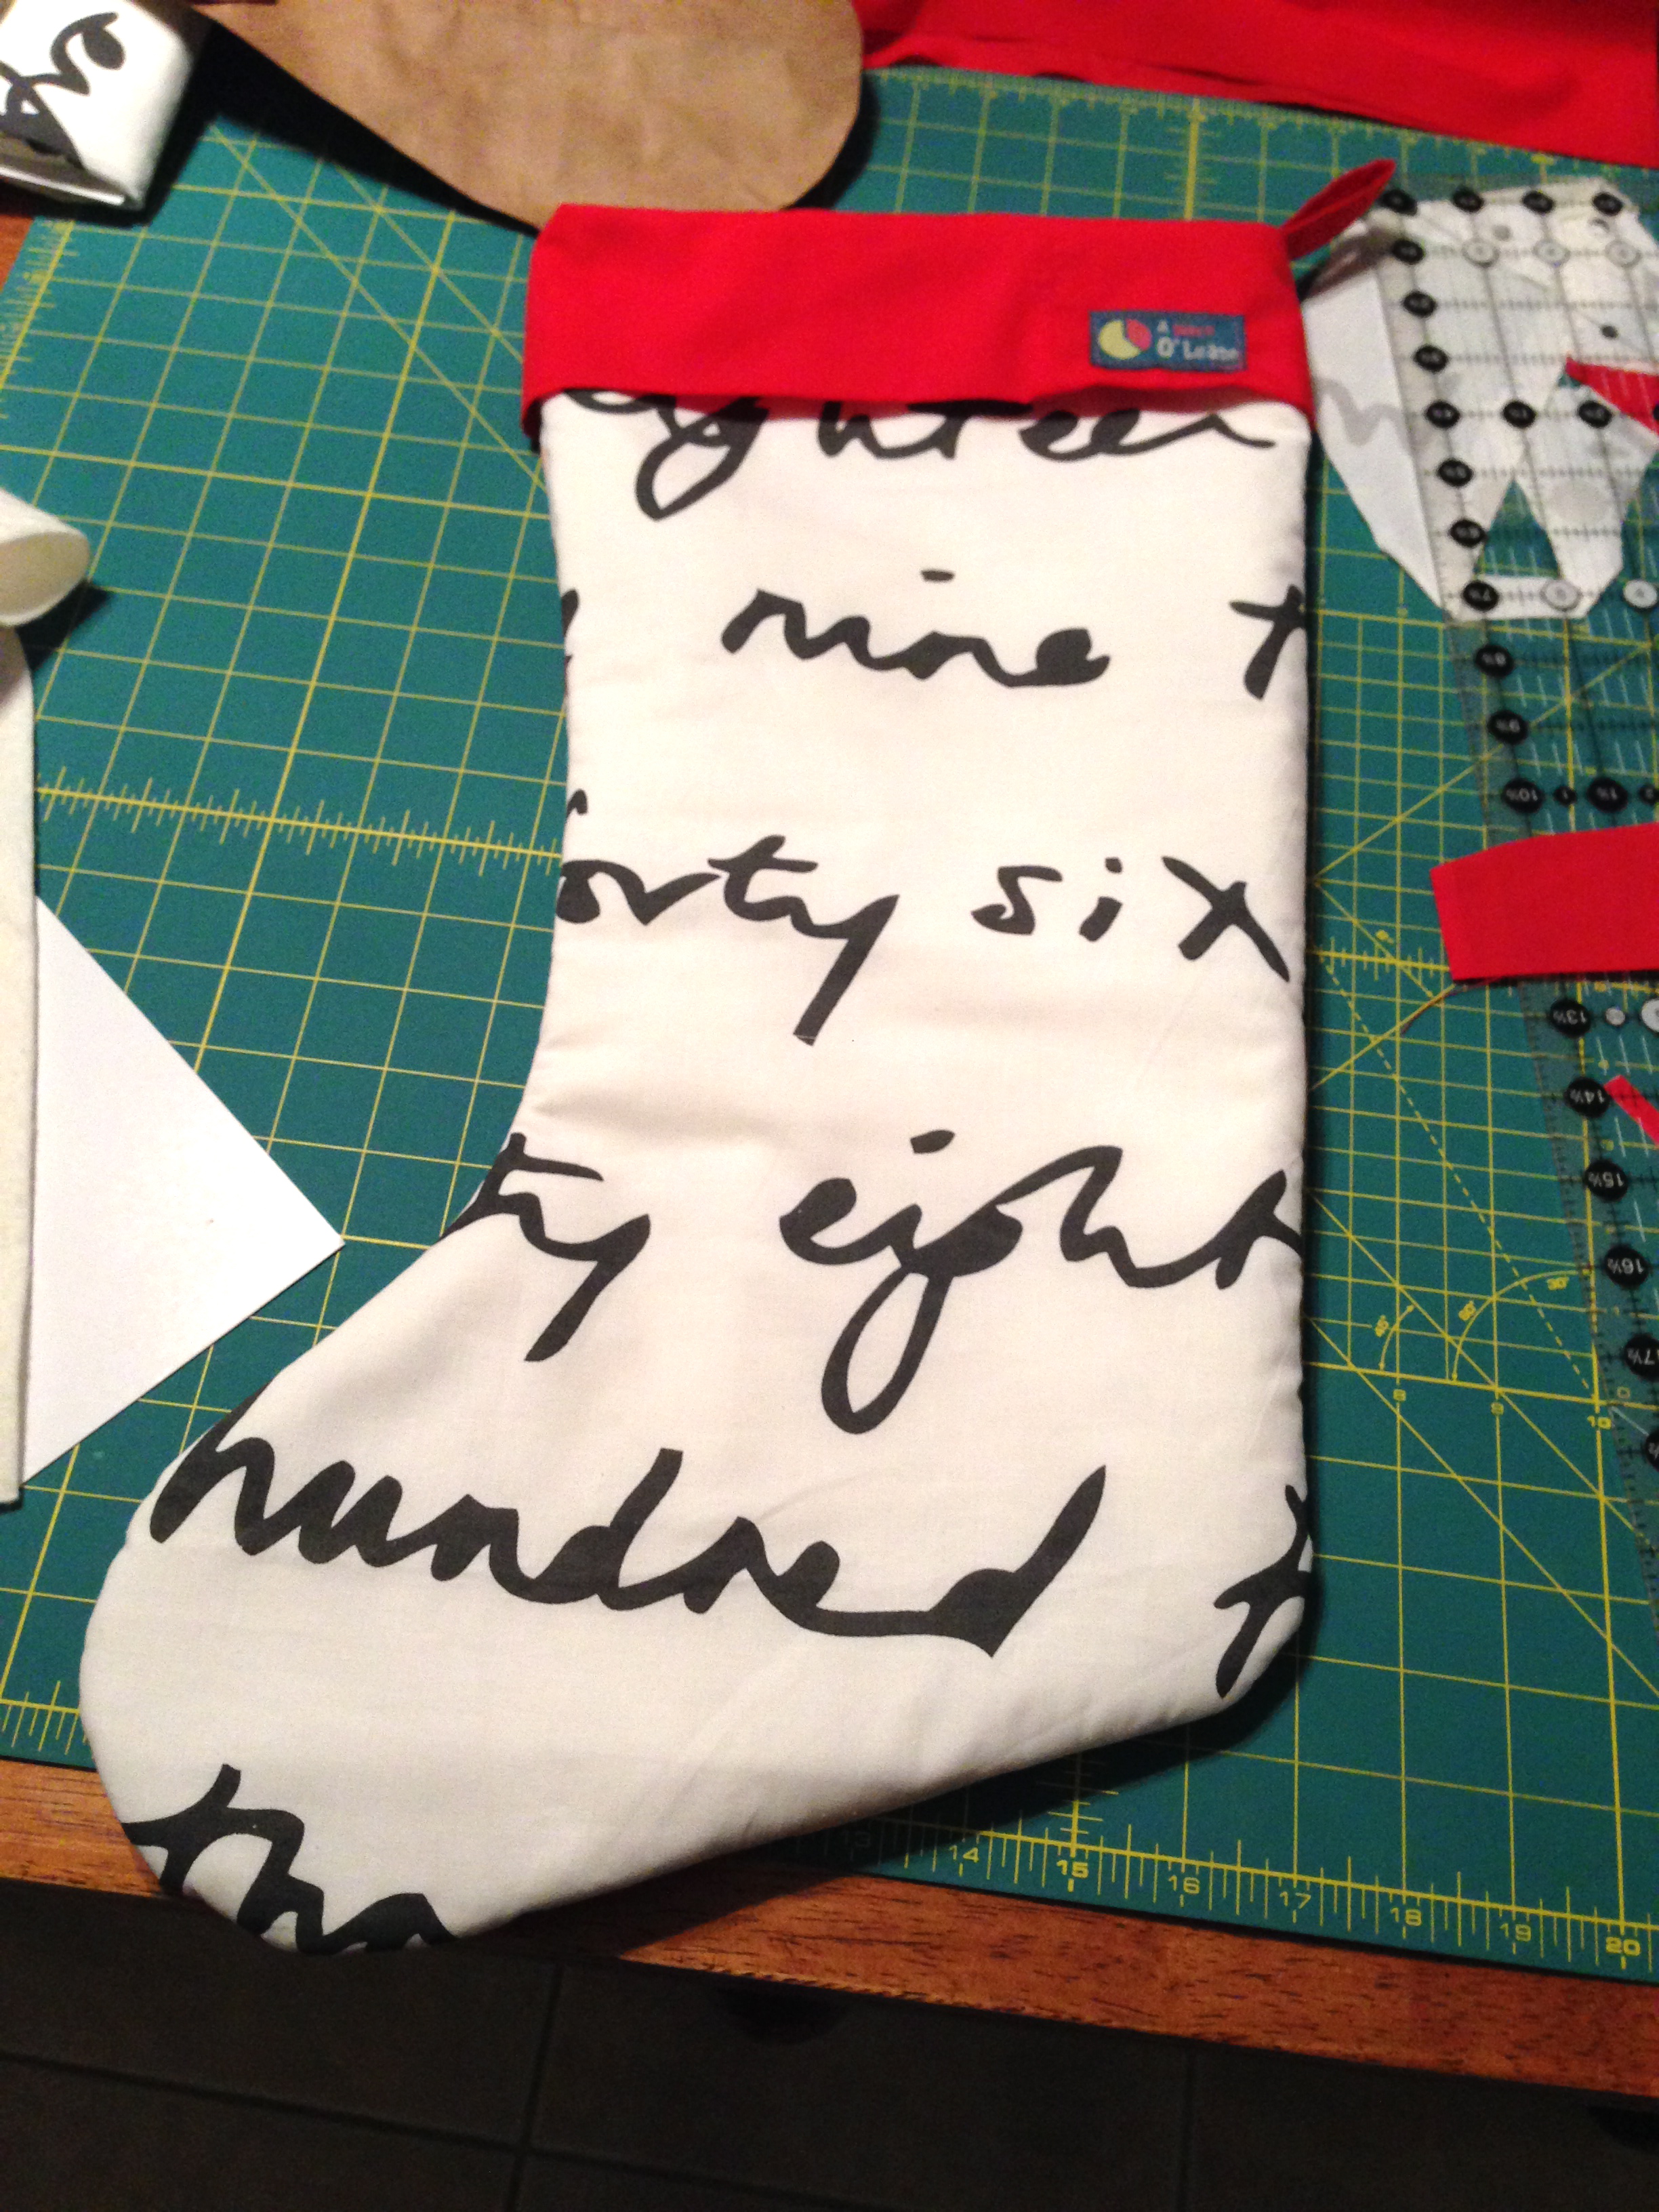
For the cuff, I cut the same height the tutorial says, but for the length I measured my own stocking piece and added about an inch so it wasn’t going to be too snug against the stocking. My stockings were kinda bog so my cuff measurement was about 7″x 21″ to go all the way around. For the remainder of the project, I just followed the tutorial! Enjoy the photos below of my finished stockings, including Levi’s which I did as a 9 patch instead of diagonals.

IMG_2588

IMG_1398

IMG_1399

IMG_1400

IMG_1362

IMG_1417

IMG_1418

IMG_2306

IMG_2304

I hope you enjoyed the linked tutorial with my additional tips! Good luck with your stockings!

Leasa

Categories
Finished Projects

Schnitzel & Boo Mini Quilt Swap #1

Lately, I have been enjoying finding other quilters on Instagram using quilting hashtags. It has been so inspiring and fun! As a bonus, I noticed many people were making mini quilts (and so many other things I want to sew LOL). But they were not just minis for themselves… they were participating in swaps. In a swap, you make a mini quilt for someone, and someone else makes on for you. Its usually done secretly and based on a questionnaire you all fill out in the beginning. Its free and looked like loads of fun! But I didn’t know how to join one. One of the awesome quilters I started following was Kristi over at Schnitzel and Boo (here). She started one and welcomed everyone, so I jumped in!

My swap partner was Leona (see her blog here). She is already a very good quilter herself and participates in loads of swaps! I was a little intimidated at first. I wanted to do something familiar to me, but still in a challenging way. The fact that it was mini was already a challenge, but I wanted to push myself. I decided to do half square triangles, which are familiar to me, but using small squares and in a rainbow gradation which I have not done before. I decided on a design pretty quickly thanks to an inspiration I found on Pinterest (here). I used Briar Rose collection by Heather Ross since my partner mentioned her in the questionnaire.

Screen shot 2013-12-07 at 1.51.02 PM

Photo Oct 12, 6 45 11 PM


Strip tube ruler cutting my HST's! And swooooning over briar rose


IMG_1034

All pieced together! Now to contemplate how to quilt it. #schnitzelandboominiquiltswap #makeaquiltmakeafriend

I quilted using a wonky straight line technique.

Oh my cute. This is going to be hard to give away. #schnitzelandboominiquiltswap #makeaquiltmakeafriend

I added triangle snuggle areas so she can hang it using a dowel if she wants 🙂

Some details! I added 2 triangles to the back upper corners so it can be hung on a dowel if she wants. #schnitzelandboominiquiltswap #makeaquiltmakeafriend

Also, along with your mini, its common to send another small handmade good and some little trinkets. My partner loves hedgehogs so I purchased THIS pattern off of Etsy and adapted it into coasters for her! They came out super cute!

4 little critters! #schnitzelandboominiquiltswap #makeaquiltmakeafriend #crochet

Here is the finished swap package! I sent adorable buttons that made me think of Orla Keily (a designer I love and own one of her diaper bags) as well as a little magnetic tin for notions. I can confidently say it was a success and Leona seemed to really love it!

IMG_1389

IMG_1391

IMG_1381

IMG_1382

IMG_1384

IMG_1385

IMG_1387

And here I am… awkwardly.. with the mini LOL

IMG_1392

Happy Quilting!!

~Leasa

Categories
Uncategorized

Come on in!

Welcome, old and new followers, to Project Leasa! All my content from the other blog got moved to here so you can still find anything you have seen before! Check the side bar for featured or favorites posts.. you might find what you’re looking for easily there!

Thats all for now! Have a look around and don’t forget to follow via the social media buttons!

Leasa
Follow my blog with Bloglovin

Categories
Parenting

All. Things. PFAPA.

I haven’t written about our latest adventure in Levi’s health on my blog yet, but recently we finally have a lot of answers and so I am ready to share. Here is a quick back story…

Around spring of 2013 I realized Levi was getting sick. A lot. And always with a high fever lasting 4-6 days. When I would take him to the Pediatrician, they would check all the usual and sometimes even a UTI but everything was always negative and concluded he had some form of “virus”. This was really weird to me because he was never a very sick infant. Hardly at all! After having a particularly bad episode of fever in July, including x-rays, ER, blood draws, catheter, antibiotics, possible Kawasaki’s disease, and just about ready for hospital admission…. I knew something wasn’t right. But on the 7th day, the fever went away and he woke up like he was never sick at all. Umm… ok… I guess. Then 3 wks later it was back and I asked to see the specialist.

Since then I have been thrust into the world of  PFAPA (Periodic Fever, Aphthous Stomatitis, Pharyngitis, Adenitis Syndrome). I recommend you read the information from this site about PFAPA before continuing, if you are not already familiar. I think does the best job of giving a quick run-down.

In Aug, we began seeing the Infectious Disease (ID) doctor, which is commonly the first step with “fever of unknown origin”. With her, he has had multiple blood tests, exams, as well as reviewing the fever calendar I composed showing all his “sick” times. From the picture below, you can see how cyclical it is.

fever

He has been mostly diagnosed with PFAPA up to this point. I know “mostly” is somewhat vague but this syndrome is newly on the books. Added only in 1987. That doesn’t mean there are not cases prior to then, only that they were not recorded as PFAPA because PFAPA classification didn’t exist before that. Up to this point, Levi’s pediatrician and the OD doc were helpful and supportive as much as possible… but that could only go so far seeing as they have only a handful of other cases.. maybe less. I joined a few PFAPA support groups on Facebook and they proved to be quite a blessing to hear from other families and what they go through with this very exhausting syndrome. One of them told me of a Dr. Lori Broderick and Dr. Hal Hoffman who, together, are the leading team of clinical research and studies into Periodic Fever Syndromes. I sent her an email and she responded right away, inviting Levi and I to visit them in San Diego 2 days later. Here is how that went:

  • I gave Levi’s entire history and brought copies of his labs and fever calendar. He gets fever ranging from 103-105 for 4-6 days straight. No other symptoms accompany this fever. About 5 days before, he seems to eat more than usual. The day before, he is incredibly tantrumy and unmanageable. The morning of, he gets clingy and whiny and opts to be held a lot and not use his familiar words. By lunch/nap time the fever has usually started. We have been treating with tylenol and motrin to keep the fever down but it only drops to about 102 typically. He is lethargic and doesn’t eat much. He will drink milk and water, though sometimes we really have to encourage him, and he will eat fruit. The last 2 episodes Levi complained of joint pain by telling us “ouch” and “hurt” in areas that have no business hurting. And crying of course. I have only seen 2 mouth sores on his tongue.. but he may have bit it. The episode on Oct 25th we used the steroid Prednisone for the 1st time. It worked within a few hours. We had to give a 2nd does on the 3rd day, but the fever stayed gone. The other behaviors that come with the episode hung around for the full 4-5 days. We noticed some slightly more enthusiastic behavior as well as more aggressive behavior for a good week after. Then, the next episode arrived only 2 weeks later. We gave a single does and it worked only 1 hr later and stayed gone. We are unsure if it was an actual episode because a runny nose came too, but also could’ve been because of allergies. We will have to see if it keeps coming sooner, meaning it would be the result of the steroid.
  • I gave my history which includes getting my own tonsils removed at 7 years old for recurrent tonsillitis. I also suffered horrible mouth sores for a good portion of my childhood, only to have them disappear some time around middle school.
  • Dr. Broderick diagnosed Levi as classic PFAPA. They have also, via their research, created a subcategory called SURFS (Syndrome of Undifferentiated Recurrent Fevers). This category is for all the a-typical PFAPA-like cases they see. Things like fevers not being predictable enough (stopping for 3 months, then restarting, changing frequency) or fever not high enough. Anything outside the definite PFAPA criteria. These patients suffer most closely to what PFAPA and other types of Periodic Fever Syndromes, but are not at this time believed to be full PFAPA diagnosis. Again, this is so new, they don’t have all the data and classifications for Periodic Fevers.
  • We talked about various treatments including the tonsillectomy. I told her the ID doc said his were small and don’t seem to pose a problem. She said often they cant see all the tonsil until they remove it, but even then Levi is kind of young and little for it. Majority of patients have them out as the kiddos approach school age. We agreed to keep trying the steroid and she gave me alternatives and various scenarios to adjusting the dose and frequency to find the right balance for Levi.
  • We will follow up with them every 6 months and to keep recording in our fever journal. Especially as Levi becomes more aware of what he is feeling and can actually communicate them, like the recent joint pain. We don’t know if he was having it before and couldn’t tell us until now.
  • They want to double check him for the HIDS form of Periodic fevers. It typically has more joint pain issues. They can check for a specific marker in urine collected during a fever episode.

The coolest bit? Learning that in their current studies, they are trying to find the marker in the gene for actual PFAPA, which would allow testing for that marker in diagnosing future patients. AND Levi will be adding to that research, just by seeing them :). As it is right now, there is no way to test specifically for the PFAPA form of Periodic fever syndromes (there are hereditary types that are really rare that do have a genetic marker to test for. His were negative, but as mentioned they want to double check the HIDS one).

That’s all she wrote… for now. Ask away and I will do my best to answer. Also, enjoy the mini gallery of some photos I took during our half day in San Diego :). The other girl pictured is my sister, Shannon.

Leasa

PS. If you would like to read more about PFAPA from other moms experiences, pop over to this lovely lady Sarah Bendel, who was the first PFAPA mom to befriend me, answer questions, and give amazing support. A few months ago she wrote a great post answering common questions people have about PFAPA. Read it HERE.

*note: this information is from my recollection from our visit and consult with these doctors and my personal experience. This should not replace info from your child’s own doctors nor used to self-diagnose.*


Categories
Uncategorized

I’m on Bloglovin!

Yay!! But I don’t know what I’m doing! Yay! You can find this blog on bloglovin and you can follow me (do they have that feature??) on there too! My user name is PieceOLease.

Also, on the topic of social media… you can find me on Pinterest, Etsy, Facebook, and Instagram too!

Follow my blog with Bloglovin

~Leasa

Categories
Featured Finished Projects How-To or Review

DIY-Triangle Quilt

I decided to do a post with the details of my triangle quilt! I got so many great compliments and people were asking for a how-to. This is going to be sort of like a step-by-step but you need to know the basics of sewing and quilting at least. This was a beginning quilting class I took, myself, at Sew Modern in Los Angeles!

1. Materials:

Basically, you need 1/3 yards of 16-26 prints. Depends on the variety you want in your quilt. You also need some batting (twin or queen size) and about 4 yards of backing. Also, I highly recommend you purchase the 60º ruler HERE on Amazon. Its a great one to have in your sewing stash and its the one used for this quilt.

And other quilting stuff like rotary cutter, basting pins, etc.

2. Cutting & Arranging Pieces:

Start with cutting 2 triangles of each print. Start arranging however you like, then decide how many more to cut of which fabrics to fill your holes. Points match up with points, sides to sides.

3. Sew, sew, sew:

Sew triangles together by row. Then match rows up by first matching seams. This will make sure you are as close as possible to lining up points. Also, its easy to stretch and pull a little here and there if the cuts of your triangles vary a little. No one will notice and try not to be too anal about it. Sew rows together. 1/4 inch seam allowance on EVERYTHING!

4. Iron:

You need to steam iron the backside where the seams are. Don’t press them open. The point is to press them down so they are less bulky. Press them in what ever direction they naturally want to lay. Just get them as flat as possible.

5. Tape, Pin, Quilt:

If you have a method you like for making a quilt sandwich and finishing your quilt in general, then go for it! If you dont have a way, you can try what I did 🙂

Use masking tape to tape down your back fabric, wrong side up! Then your batting. Tape it down too. Then the quilt top right side up. You want to tape it kind of taught because you want to pin it with little slack so that you don’t quilt over any wrinkles and create puckers. SMALL PUCKERS WILL HAPPEN! Its impossible for no wrinkles to happen at all, you just don’t want giant spots that were unsmoothed. Pin your fabric with the curved basting pins no further apart that a hands width from each other. Start in the middle and work your way to the edges, smoothing with your hands as you go. You will use a lot of them. Make sure the pin goes through all 3 layers! Now you are ready to quilt! I chose straight vertical lines, but you could do them on a diagonal or free form I guess. I just winged it so the widths between the stitched lines varied and they were not exactly straight but I didn’t mind. Remove the pins as you go. After you quilt it, cut off all the extra fabric, making it into the clean edges. In doing so, you will be cutting the end triangles in half.

<—- back taped down.

<—- after pinning, mine wasnt smooth enough so I repinned (without taping a second time) and just really smoothed as I went. Still from the middle out.

6. Make Binding and Attach Binding:

The binding you make isn’t going to be cut on the bias. Instead, you will cut 2 1/2 inch strips out of your 1/3 yards of fabric. Start by folding your yardage in half, then cut your strips, vertically. So each cut strip is 2x as long. Sew your binding strips together. If you don’t know how, diagram below. Then press your long binding strip in half (wrong sides together) so its now single fold binding tape. Learn how to make your binding HERE from Ava Landen. Make sure to fold your binding in half and press.

Now its time to start attaching your binding. Match up the raw edge of your binding with the raw edge of the back side of your quilt. Sew around with a 1/4 seam allowance. Don’t pin the binding, just position it as you go.. trust me, its better that way.  Make sure when you get to a corner, you make a mitered corner. Sew all the way to the end, finish off, then fold the strip over itself to make a 90Ëš angle. Then fold again back the other way along the side of the quilt. Learn how to do a mitered corner HERE from About.com

Stop about 8″ from your start spot. You need to attach the ends of the binding seamlessly like the rest of it. Use this video tutorial from “Sew Modern” (where I took my class). Finish sewing the binding to the back.

8. Blind Stitch to Finish:

Now, fold the binding over to the right side and finish off with a blind stitch.

All Done!

  Stoli bomb

HUGE thanks to Sew Modern for this class! It got me hooked on quilting. And also, this is their quilt pattern, not mine. All the high-fives belong to them. 🙂

~Leasa